> Source: [sk83700](https://support.checkpoint.com/results/sk/sk83700)
# sk83700 - How to customize and localize the UserCheck portal
| Property | Value |
|----------|-------|
| Solution ID | sk83700 |
| Date Created | 2012-11-05 |
| Last Modified | 2023-11-06 |
| Technical Level | General |
| Products | Security Gateway |
| Versions | R81.20, R81.10 (EOS), R81 (EOS) |
| OS | Gaia |
## Solution
**Table of Contents:**
1. Introduction
2. General Disclaimer
3. Changing the language in the UserCheck Portals (localization)
4. Logo Removal and Customizations
5. Expanding the UserCheck Text Width
6. Redirecting to Static External .com Web Site
7. Replacing the Check Point Text in the Browser Tab
8. Replacing the UserCheck Icon in the Browser Tab and the Address Bar
9. Changing the background color / image on the UserCheck pages
10. Removing the HTTP 'GET' parameters from the URL
11. Other Interesting UserCheck Features
(I) Introduction {#Introduction}
--------------------------------
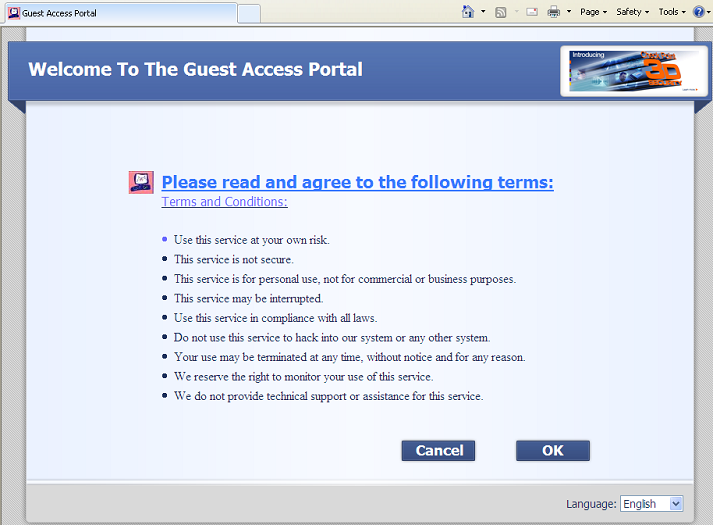
This guide discusses several UserCheck customizations that provide the functionality of a public Internet access HotSpot for specific networks. When users on those networks attempt to access the Internet, they will be automatically re-directed to the HotSpot page (a functionality similar to the Edge HotSpot feature).
The particular scenario is a retail environment in which a customer uses his or her mobile device to connect to the retailer's Wi-Fi network, thus gaining access to the in-store Internet connection. The retailer requires that the customer be presented with a "Terms of Use" page; after clicking on an acknowledgment button, the customer will be directed to the retailer's main .com Internet web site. After this redirection, the customer is free to browse wherever he/she wants, limited by the Application Control \& URL Filtering policy.
The HotSpot functionality has to meet the following requirements: removal of all vendor graphics and product references, redirection to a specific web site after the customer acknowledges the Terms of Use, and the ability to insert custom logos and text.
(II) General Disclaimer {#General Disclaimer}
---------------------------------------------
Any customizations made should be fully tested to ensure proper operations. Recognize that upgrades and hotfixes can potentially remove these customizations, so testing updates to determine compatibility with these customizations is recommended.
**Note that all the changes mentioned apply to files residing on the Security Gateway, not the Security Management Server.**
In order for the customizations to take effect, run these commands on the Security Gateway: either '***cprestart*** ', or '***mpclient stop UserCheck ; mpclient start UserCheck***'.
(III) Changing the language in the UserCheck Portals (localization) {#Changing the language in the UserCheck Portals}
---------------------------------------------------------------------------------------------------------------------
You can use more than one language in the UserCheck Portal. You can localize the whole portal, and not just the message to the user. For example, you can localize the "OK" and "Cancel" buttons.
Languages supported by default:
* English
* French
* Spanish
* Japanese
For example, to localize the **"*OK*"** button into **French**, follow these steps:
1. Add the desired language into the ***/opt/CPUserCheckPortal/phpincs/conf/L10N/supportedLanguages.php*** file (using the comma).
**Note:** For the list of languages and their abbreviations, refer to the ***/opt/CPUserCheckPortal/phpincs/conf/L10N/languageCodes.php*** file.
>
> ```
> $arLanguages = array(
> "en" => "English",
> "fr" => "French"
> );
>
> //In automatic language detection, a 2nd degree match - of the prefix only - use these defaults for multi-dialect languages
> //This list includes only languages for which we support one dialect only.
> $arMultiDialectLanguages = array(
> "en" => "en",
> "fr" => "fr"
> );
> ?>
> ```
2. Create the new UserCheck Portal file in the desired language inside the ***/opt/CPUserCheckPortal/phpincs/conf/L10N/*** directory - based on the existing English file ***/opt/CPUserCheckPortal/phpincs/conf/L10N/portal_en.php***
**Notes:**
* For the list of languages and their abbreviations, refer to the ***/opt/CPUserCheckPortal/phpincs/conf/L10N/languageCodes.php*** file.
* The new UserCheck Portal file in the desired language ***must*** be saved in the UTF-8 encoding (if it is saved in the ANSI encoding, it will not be read correctly).
***\[Expert@HostName\]# cd /opt/CPUserCheckPortal/phpincs/conf/L10N/***
***\[Expert@HostName\]# cp portal_en.php portal_fr.php***
3. Translate the desired attributes inside the new UserCheck Portal file.
***\[Expert@HostName\]# vi /opt/CPUserCheckPortal/phpincs/conf/L10N/portal_fr.php***
In our example, we localize the **"*OK*"** button into **French** (to appear when the user chooses '*French*' in the portal's language drop-down):
|----------|---------------------------------------------|
| Original | ``` "BUTTON.OK" => "OK", ``` |
| Modified | ``` "BUTTON.OK" => "OK_text_in_French", ``` |
**Notes:**
* The English "OK" button will still be **"*OK*"** , while the French "OK" button will be **"*OK_text_in_French*"**, or whatever you choose it to be.
* The new UserCheck Portal file in the desired language ***must*** be saved in the UTF-8 encoding (if it is saved in the ANSI encoding, it will not be read correctly).
(IV) Logo Removal and Customizations {#Logo Removal and Customizations}
-----------------------------------------------------------------------
A very quick way to remove Check Point logos is to replace the standard files with "no logo" versions.
In the */opt/CPUserCheckPortal/htdocs/UserCheck/**img**/* directory, use the files that contain the text "nologo" in their names to overwrite the corresponding files without the "nologo" text. For example, to replace the standard footer logo, copy the *footer_nologo.png* to *footer.png*.
Note that the text wraps in the title and message sections in the original, but not in the modified version.
|----------|-----------------------------------------------------------------------------------------------------------|
| Original |  |
| Modified |  |
The following list shows all the "no logo" files that can be used with their associated logo files:
* *footer.png*
* *footer_nologo.png*
* *footer_ie6.png*
* *footer_ie6_nologo.png*
* *thin_background.png*
* *thin_background_nologo.png*
In addition to these files, take a look at other files within the */opt/CPUserCheckPortal/htdocs/UserCheck/**img**/* directory. If you do not like the standard exclamation point graphic, replace it by creating a new *inform.png* . Take some time to explore this directory to understand what can be modified.
For example, I had some display issues when adding a custom logo using the UserCheck editor within the SmartDashboard. To resolve this, I just replaced the *banner_logo.png* file.
(V) Expanding the UserCheck Text Width {#Expanding the UserCheck Text Width}
----------------------------------------------------------------------------
Have you found that the UserCheck text display is just too narrow? Do you want to increase it? To change the widths, perform the following:
1. Edit the ***/opt/CPUserCheckPortal/phpincs/view/css/UserAction.php*** file.
2. Find the class ***.usercheck_title_class*** , scroll down a few lines to width settings, and modify the default value of **335px** to a value between 335px and 550px.
3. Find the ***usercheck_message_class*** , scroll down a few lines to width settings, and modify the default value of **335px** to a value between 335px and 550px.
Note that the text wraps in the title and message sections in the original version, but not in the modified version.
|----------|-------------------------------------------------------------------------------------------------------------------------------------------------------------------------------------------------------------------------------------------------------------------------------------------------------------------------------------------------------------------------------------------------------------------------------------------------------------------------------------------------------------------------------------------------------------------------------------------------------------------------------------------------------------------------------|
| Original | ``` usercheck_title_class { ...... width: expression( document.body.clientWidth > 334 ? "335px" : "auto" ); /* sets max-width for IE */ max-width: 335px; /* this sets the max-width value for all standards-compliant browsers */ } usercheck_message_class { ...... width: expression( document.body.clientWidth > 334 ? "335px" : "auto" ); /* sets max-width for IE */ max-width: 335px; /* this sets the max-width value for all standards-compliant browsers */ min-width: 335px; /* this sets the max-width value for all standards-compliant browsers */ } ``` 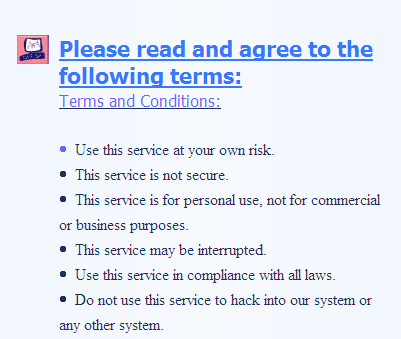 |
| Modified | ``` usercheck_title_class { ...... width: expression( document.body.clientWidth > 334 ? "550px" : "auto" ); /* sets max-width for IE */ max-width: 550px; /* this sets the max-width value for all standards-compliant browsers */ } usercheck_message_class { ...... width: expression( document.body.clientWidth > 334 ? "550px" : "auto" ); /* sets max-width for IE */ max-width: 550px; /* this sets the max-width value for all standards-compliant browsers */ min-width: 550px; /* this sets the max-width value for all standards-compliant browsers */ } ``` 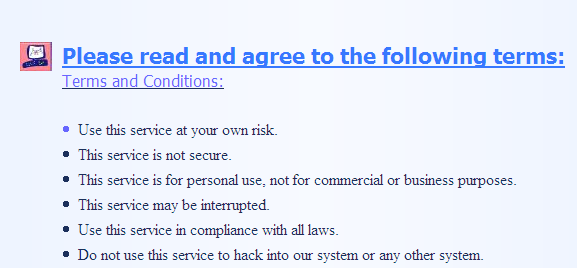 |
(VI) Redirect to Static External .com Web Site {#Redirect to Static External .com Web Site}
-------------------------------------------------------------------------------------------
The normal behavior for UserCheck will be to intercept the URL requested by the user, present inform or ask page, then redirect the user to the originally requested URL. This customization will instead always redirect the user to the pre-configured, embedded, web site.
Using Vi editor, modify the following **two** files (make sure to enclose the URL within quotes):
Note: In the examples below, the user will always be redirected to ***http://www.checkpoint.com/***.
1. ***/opt/CPUserCheckPortal/phpincs/view/js/UserAction.php***
|----------|-------------------------------------------------------------|
| Original | ``` var RedirectToAddr = newViewJSONObj.RedirectToAddr; ``` |
| Modified | ``` var RedirectToAddr = "http://www.checkpoint.com/"; ``` |
2. ***/opt/CPUserCheckPortal/phpincs/web/interceptors/UCCookieInterceptor.php***
### Location 1
|----------|-----------------------------------------------------------------------------------------------------------------------------------------------------------------------------------------------------------|
| Original | ``` if($data->AutoRedirect == true && $data->RedirectToAddr != "") { if (!isset($IsThinPortal) ) { header('Location: ' . $data-\>RedirectToAddr); } else { header('Location: about:blank'); } } ``` |
| Modified | ``` if($data->AutoRedirect == true && $data->RedirectToAddr != "") { if (!isset($IsThinPortal) ) { header('Location: ' . "http://www.checkpoint.com/"); } else { header('Location: about:blank'); } } ``` |
### Location 2
|----------|-------------------------------------------------------------------------------------------------------------------------------------------------------------------------------------------------------------------------------------------------------------------------------------------------------------------------------------------------------------------------------------------|
| Original | ``` if (!isset($IsThinPortal) ) { if ($REQUEST->getRequestParam("origUrl", $REQUEST->GET_REQ_PARAMS) == null) { throw new Exception("origUrl is empty"); } else { header('Location: ' . $UTILS::base64url_decode($REQUEST-\>getRequestParam("origUrl", $REQUEST-\>GET_REQ_PARAMS))); } } else { header('Location: ' . "www.closeCheckPointusercheckthinclientpopupmessageurl.com"); } ``` |
| Modified | ``` if (!isset($IsThinPortal) ) { if ($REQUEST->getRequestParam("origUrl", $REQUEST->GET_REQ_PARAMS) == null) { throw new Exception("origUrl is empty"); } else { header('Location: ' . "http://www.checkpoint.com/"); } } else { header('Location: ' . "www.closeCheckPointusercheckthinclientpopupmessageurl.com"); } ``` |
(VII) Replacing the Check Point Text in the Browser Tab {#Replacing the Check Point Text in Browser Tab}
--------------------------------------------------------------------------------------------------------
To change the page header, the text in the tab, using Vi editor, modify the following **three** files:
1. ***/opt/CPUserCheckPortal/htdocs/UserCheck/PortalMain***
and
***/opt/CPUserCheckPortal/htdocs/UserCheck/PortalMainThin***
|----------|-------------------------------------------------------------------------------------------------------------------------------------------------------------------------------------------------------------------------------|
| Original | ``` function fatal_error_handler($buffer){ $error=error_get_last(); if($error['type'] == 1){ // type, message, file, line $newBuffer='Check Point UserCheck
> ```
> .usercheck_body_background_class
> {
> background: url('getUrl("sliver_pattern.png", "img"); ?>') repeat scroll center center;
> }
>
> .usercheck_main_background_class
> {
> background: url('getUrl("blue_background.png", "img"); ?>') repeat-y scroll center center;
> }
> ```
* Replace the original image files "*sliver_pattern.png* " and "*blue_background.png* " with the customer's image files without changing the CSS file (*/opt/CPUserCheckPortal/phpincs/view/css/UserAction.php* ).
The image files are located in */opt/CPUserCheckPortal/htdocs/UserCheck/**img**/* directory:
```
[Expert@GW_HostName]# cd /opt/CPUserCheckPortal/htdocs/UserCheck/img/
[Expert@GW_HostName]# mv sliver_pattern.png sliver_pattern.png_ORIGINAL
[Expert@GW_HostName]# mv blue_background.png blue_background.png_ORIGINAL
[Expert@GW_HostName]# cp /path_to_customer_image_files/sliver_pattern.png sliver_pattern.png
[Expert@GW_HostName]# cp /path_to_customer_image_files/blue_background.png blue_background.png
```
(X) Removing the HTTP 'GET' parameters from the URL {#Removing the HTTP 'GET' parameters from the URL}
------------------------------------------------------------------------------------------------------
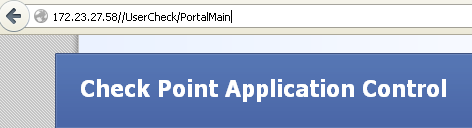
When an incident is caught, by default, the URL is displayed similarly to the following:
> 
The procedure described below allows for the display only of the URL (without irrelevant HTTP parameters):
> 
**Procedure:**
1. Modify the ***/opt/CPUserCheckPortal/phpincs/view/html/PortalMain.php*** file.
2. Search for all occurrences of the string ***GET_REQ_PARAMS*** and modify it to ***GET_POST_REQ_PARAMS***:
|----------|-------------------------------------------------------------------------------------------------------------------------------------------------|
| Original | ``` UserCheck.DataObj.IID = getRequestParam("IID", $REQUEST->GET_REQ_PARAMS))); ?>; ``` |
| Modified | ``` UserCheck.DataObj.IID = getRequestParam("IID", $REQUEST->GET_POST_REQ_PARAMS))); ?>; ``` |
3. Add a new javascript section:
```
................................
// START of new SCRIPT section
\