> Source: [sk176726](https://support.checkpoint.com/results/sk/sk176726)
# sk176726 - Protecting Azure PaaS services using CloudGuard for Azure
| Property | Value |
|----------|-------|
| Solution ID | sk176726 |
| Date Created | 2022-01-10 |
| Last Modified | 2022-11-23 |
| Technical Level | General |
| Products | Cloud Firewall |
| Versions | R81 (EOS), R81.10 (EOS), R81.20 |
| Platform | Azure |
## Solution
**Table of Contents**
* 1. Overview
* 2. Azure private link introduction
* 3. Deploy and configure a PaaS service in Azure
* 3.1. Deploy a PaaS instance
* 3.2. Private Endpoint Creation
* 4. Configuring CloudGuard Network products to protect PaaS services
* 4.1. CloudGuard Controller configuration
* 4.2. East-West Traffic
* 4.3. Inbound Traffic
* 5. Limitations
Click Here to Show Entire Article
(1) Overview {#Overview}
------------------------
Azure provides PaaS instances such as SQL servers and storage.
Unlike IaaS instances, PaaS instances do not have an IP and are accessible through FQDN.
CloudGuard Network offers protection support for environments with PaaS instances.
(2) Azure private link introduction {#Tools}
--------------------------------------------
Show / Hide this section
### Private Endpoint {#Toggle_Tools}
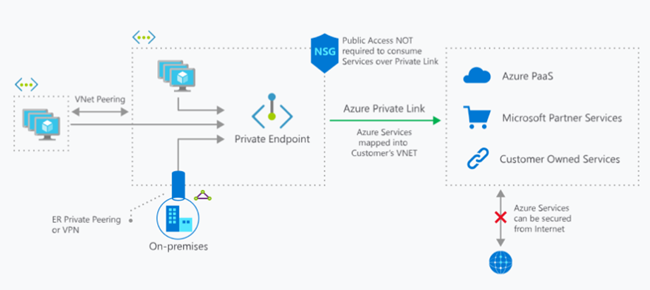
Use Private Link to bring services delivered on Azure into your private virtual network by mapping it to a private endpoint, or privately supply your own services in your customers' virtual networks. Private Link keeps traffic on the Microsoft global network.
### How it works
The design of a [private endpoint](https://docs.microsoft.com/en-us/azure/private-link/private-endpoint-overview) enables access to a PaaS instance.
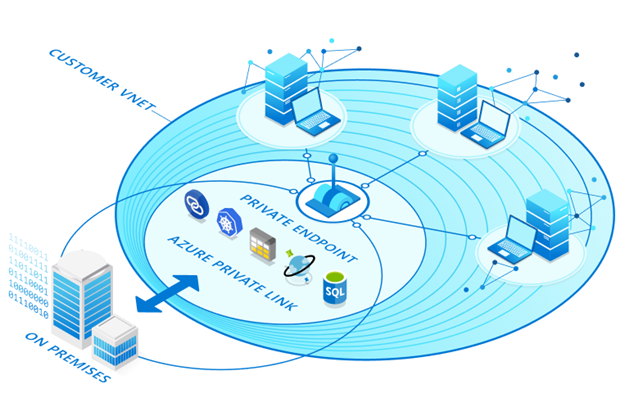
In this case, all the consumed resources stay on the Azure network. Because private links let you adjust the UDRs, you can secure and protect PaaS services, eliminating the "non-protected" access.
(3) Deploy and configure a PaaS service in Azure {#Setup}
---------------------------------------------------------
### (3.1) Deploy a PaaS instance {#Deploy a PaaS instance}
Show / Hide this section
The example below focuses on a SQL server. However, this solution can work with any PaaS instance.
If you have already deployed a PaaS instance, jump to step 3.2. - Private Endpoint Creation.
1. SQL Server: 
2. Click on Create:

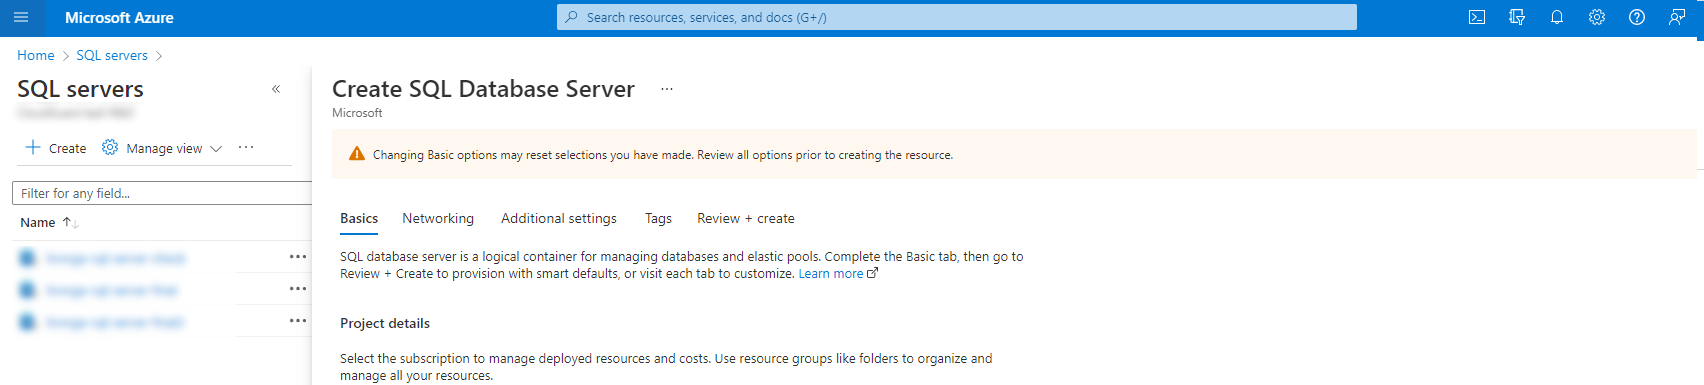
3. Configure as desired:
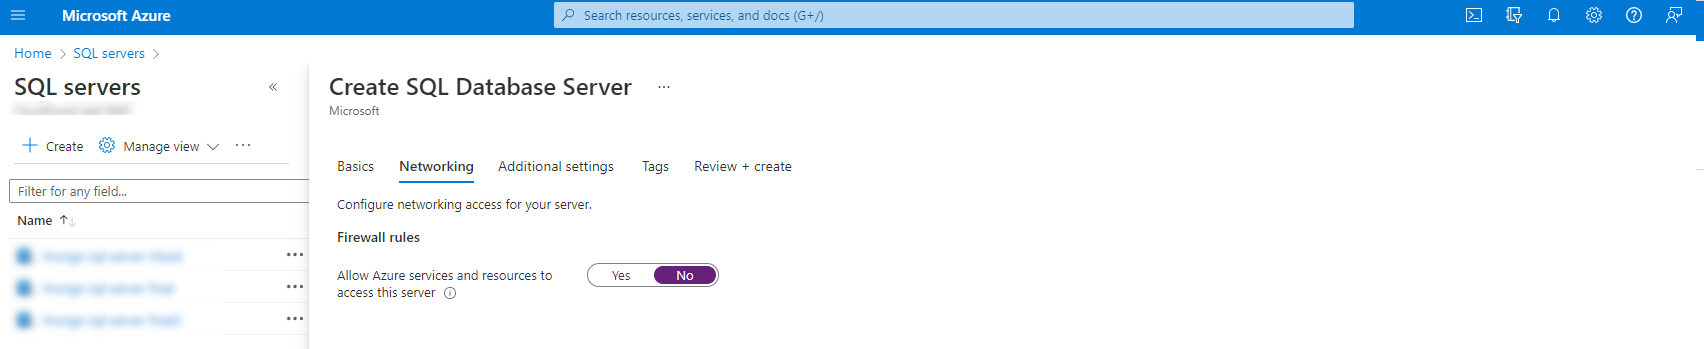
4. Decline an access to SQL server:
5. Review + Create
This is the initial architecture after the SQL server creation:
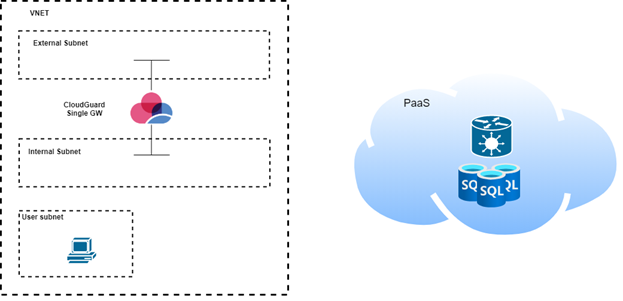
As a PaaS service is deployed, it deploys behind Azure Gateways in Azure.
That means it is external to the VNET and can be accessed from **everywhere**.
To continue, create a private endpoint:
### (3.2) Private Endpoint Creation {#Private Endpoint Creation}
Show / Hide this section
1. Go to the **SQL new resource**:
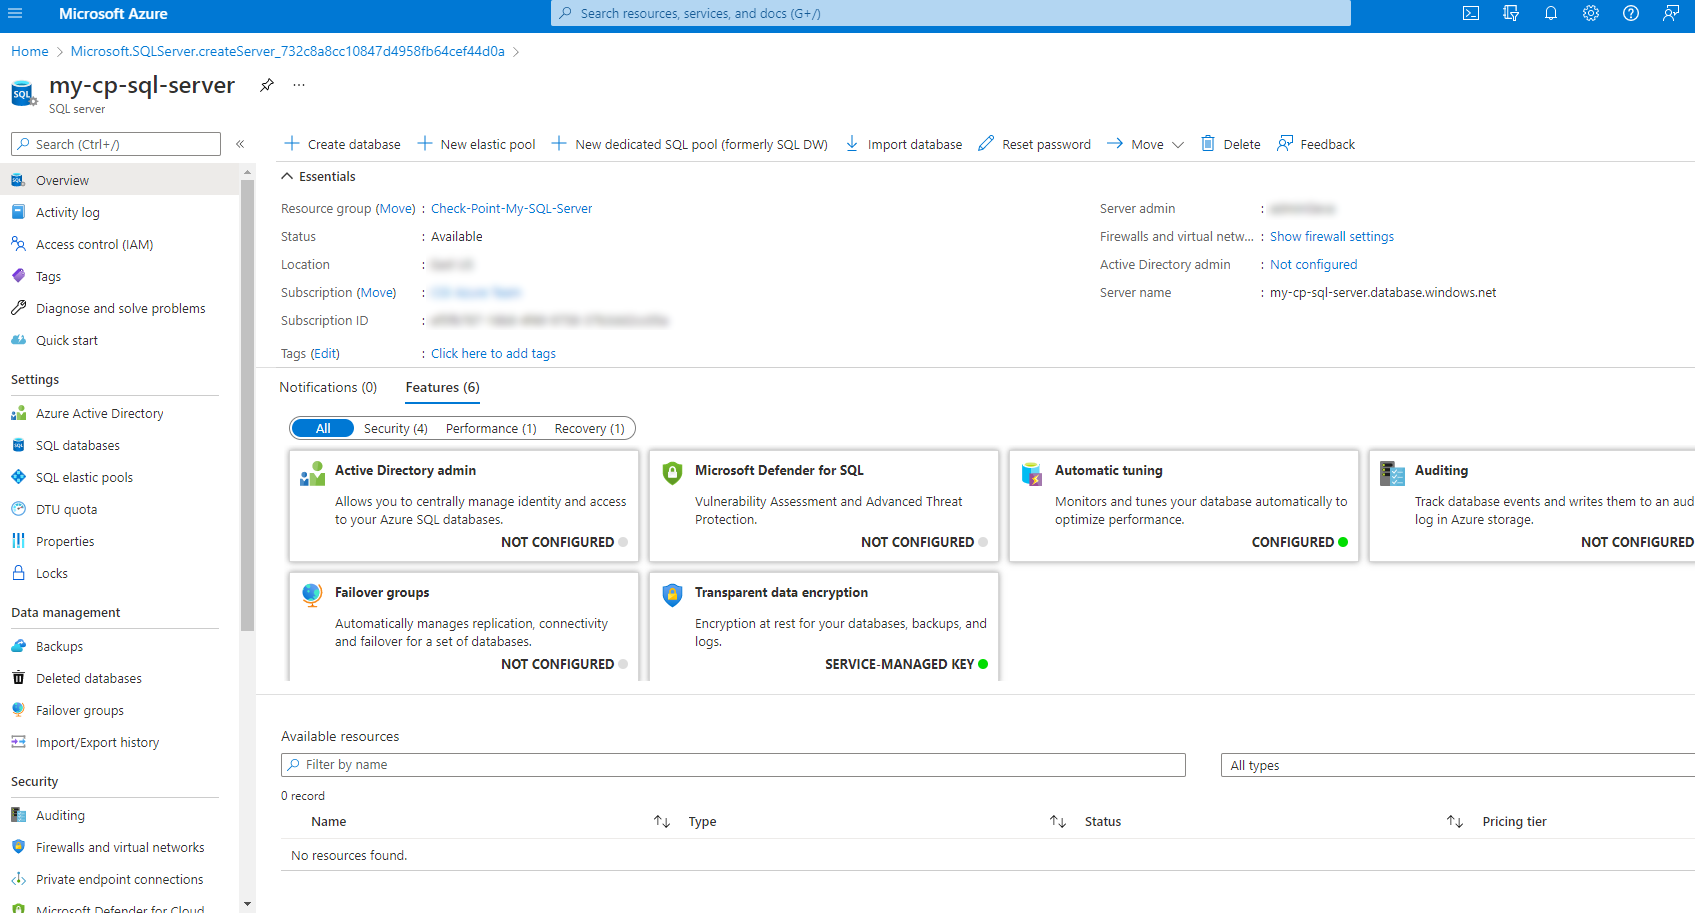
2. Select on the left menu **Private endpoint connections**
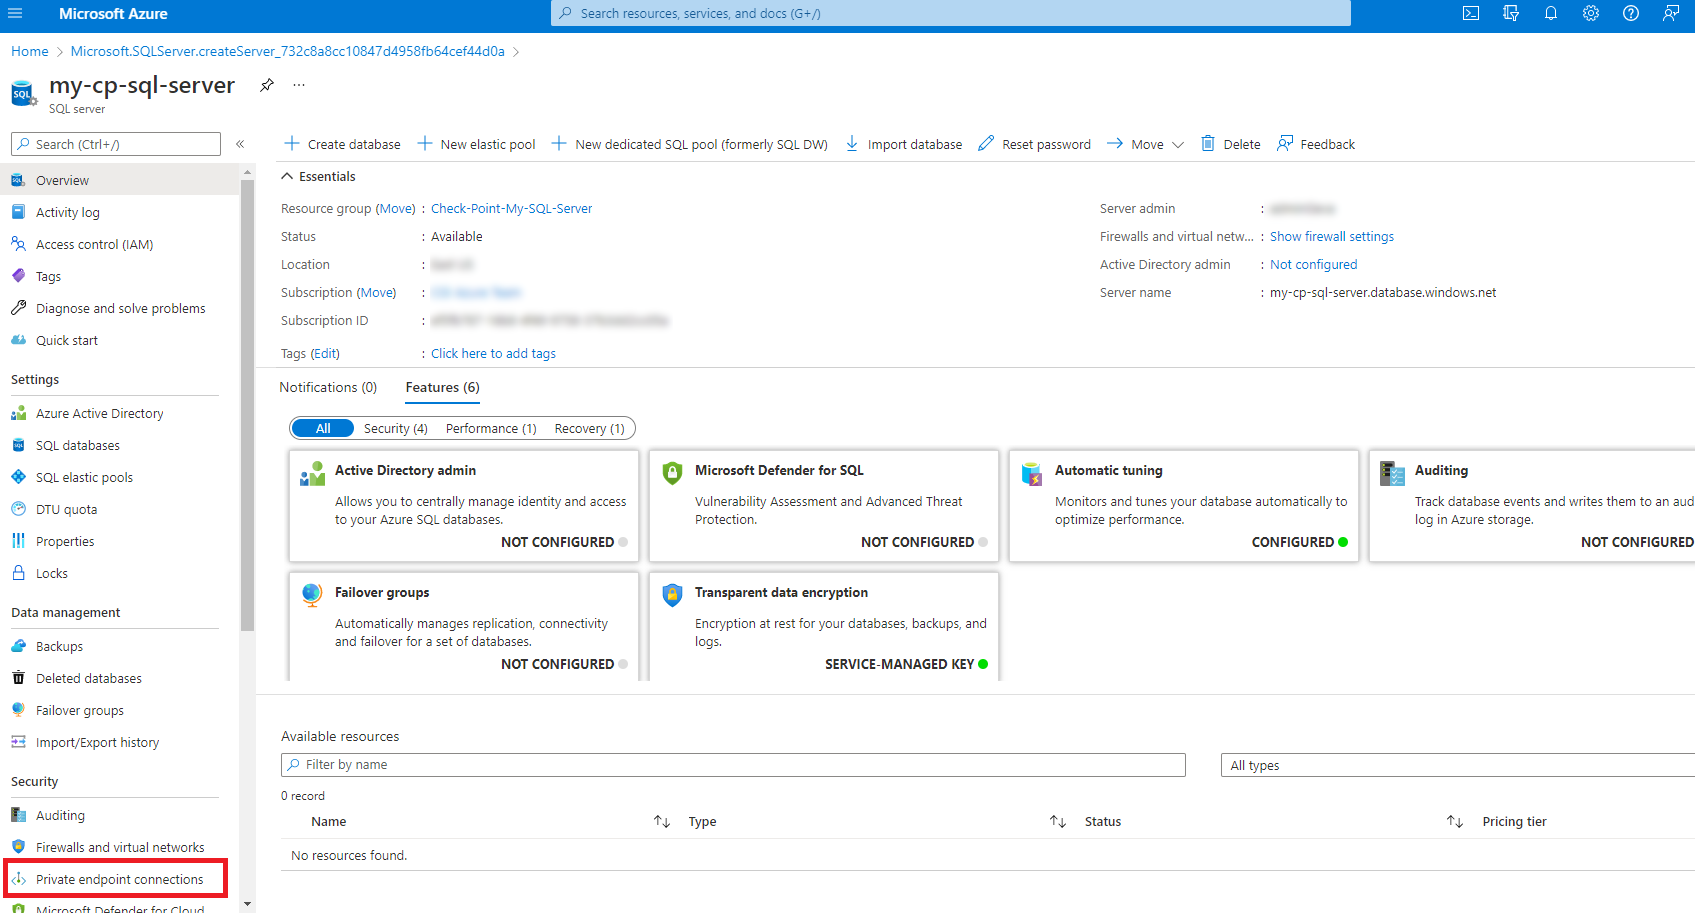
3. Create a new Private-Endpoint:
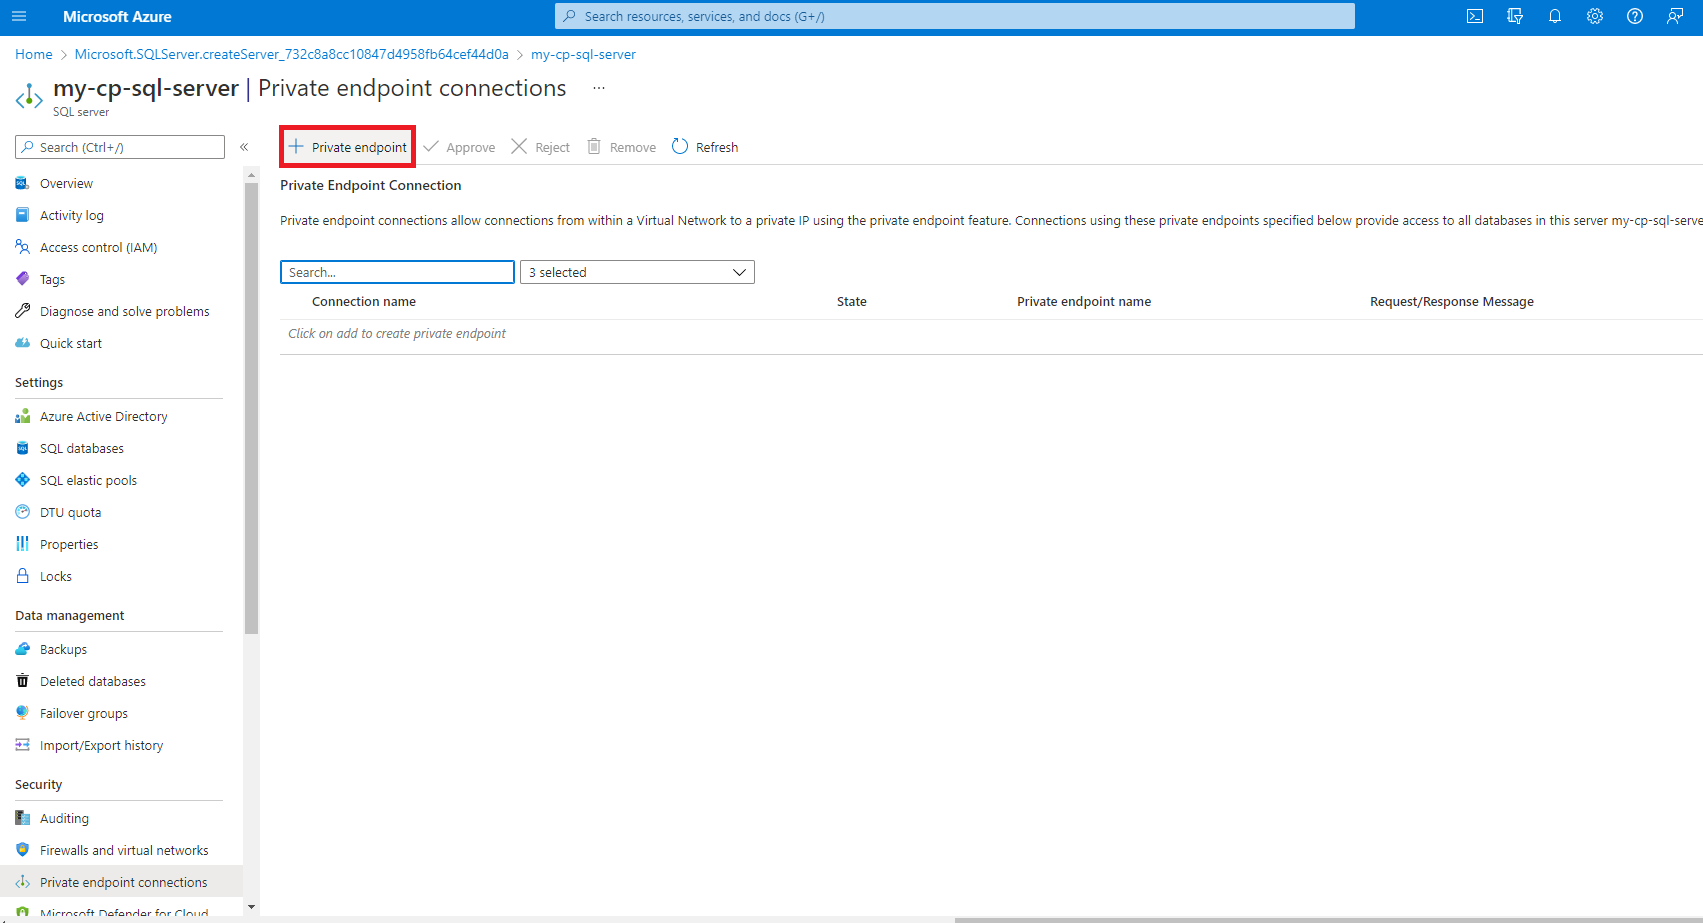
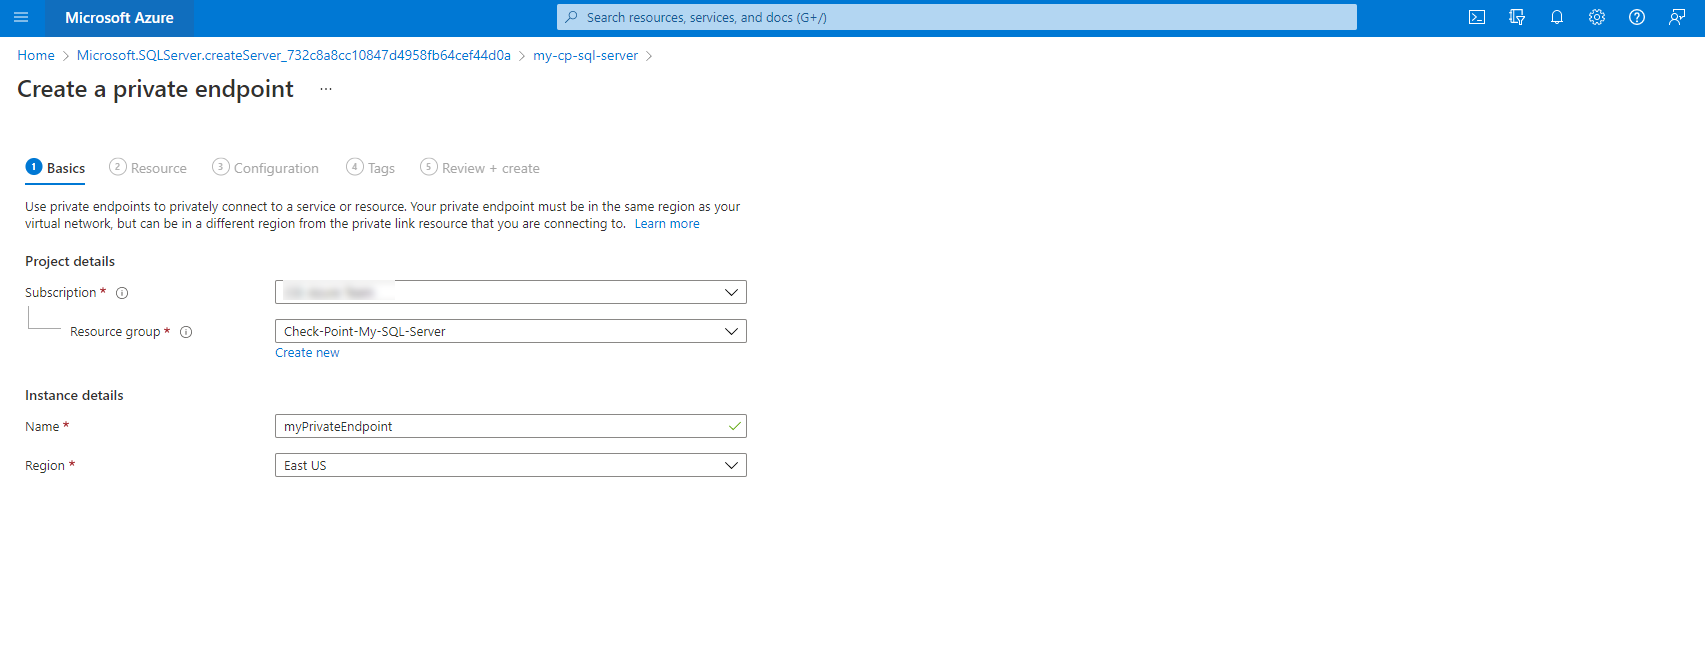
4. Select the subscription and region the SQL is placed:
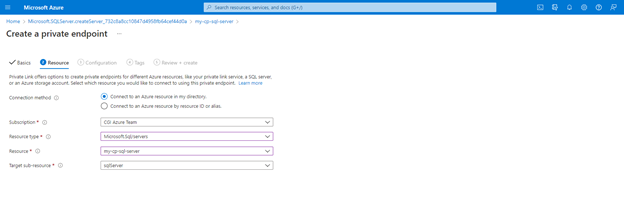
5. Select the type of resource you are making a private-endpoint for
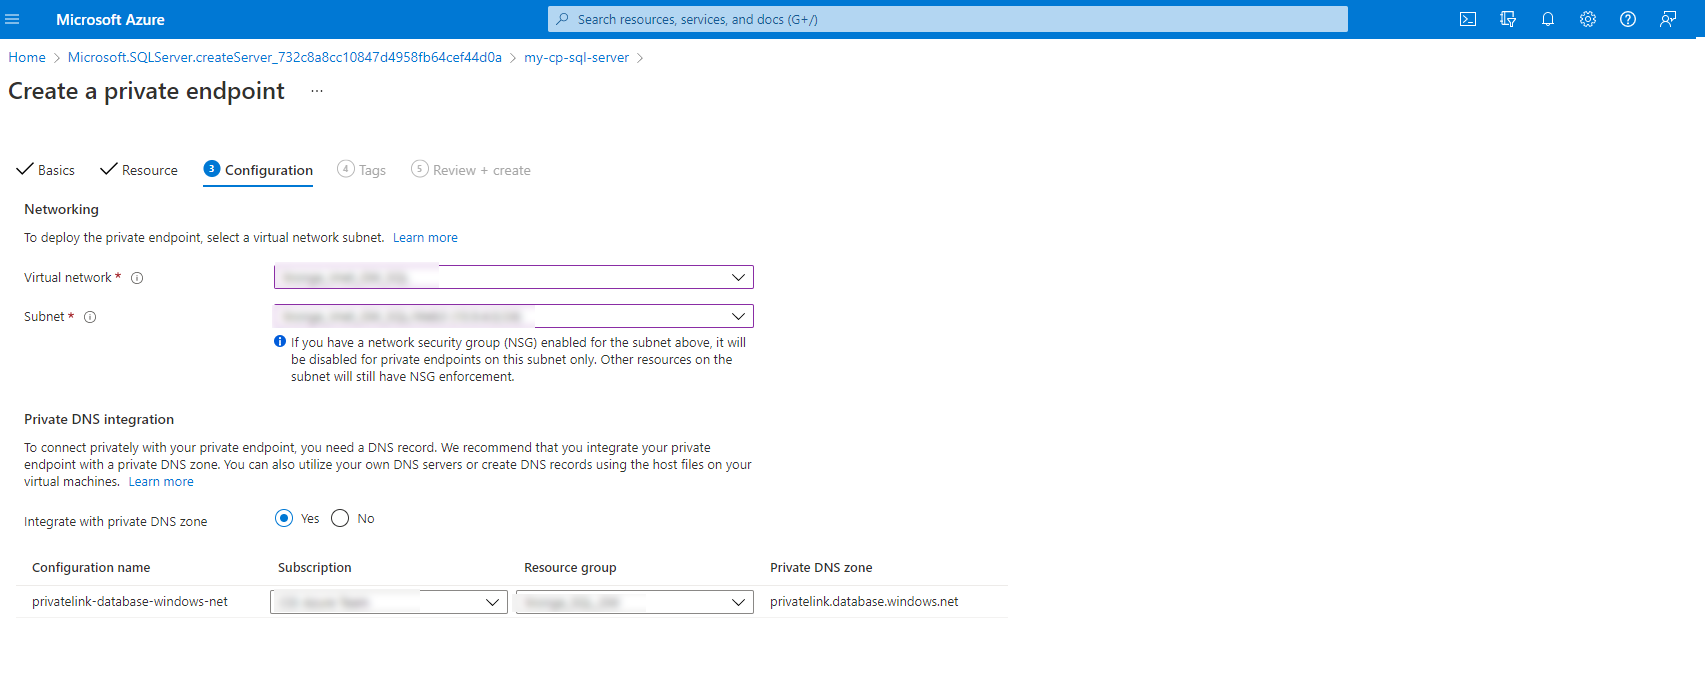
6. Place it in the subnet you would like.
Select **Integrate with private DNS zone**
7. No tags are necessary
8. Review + Create
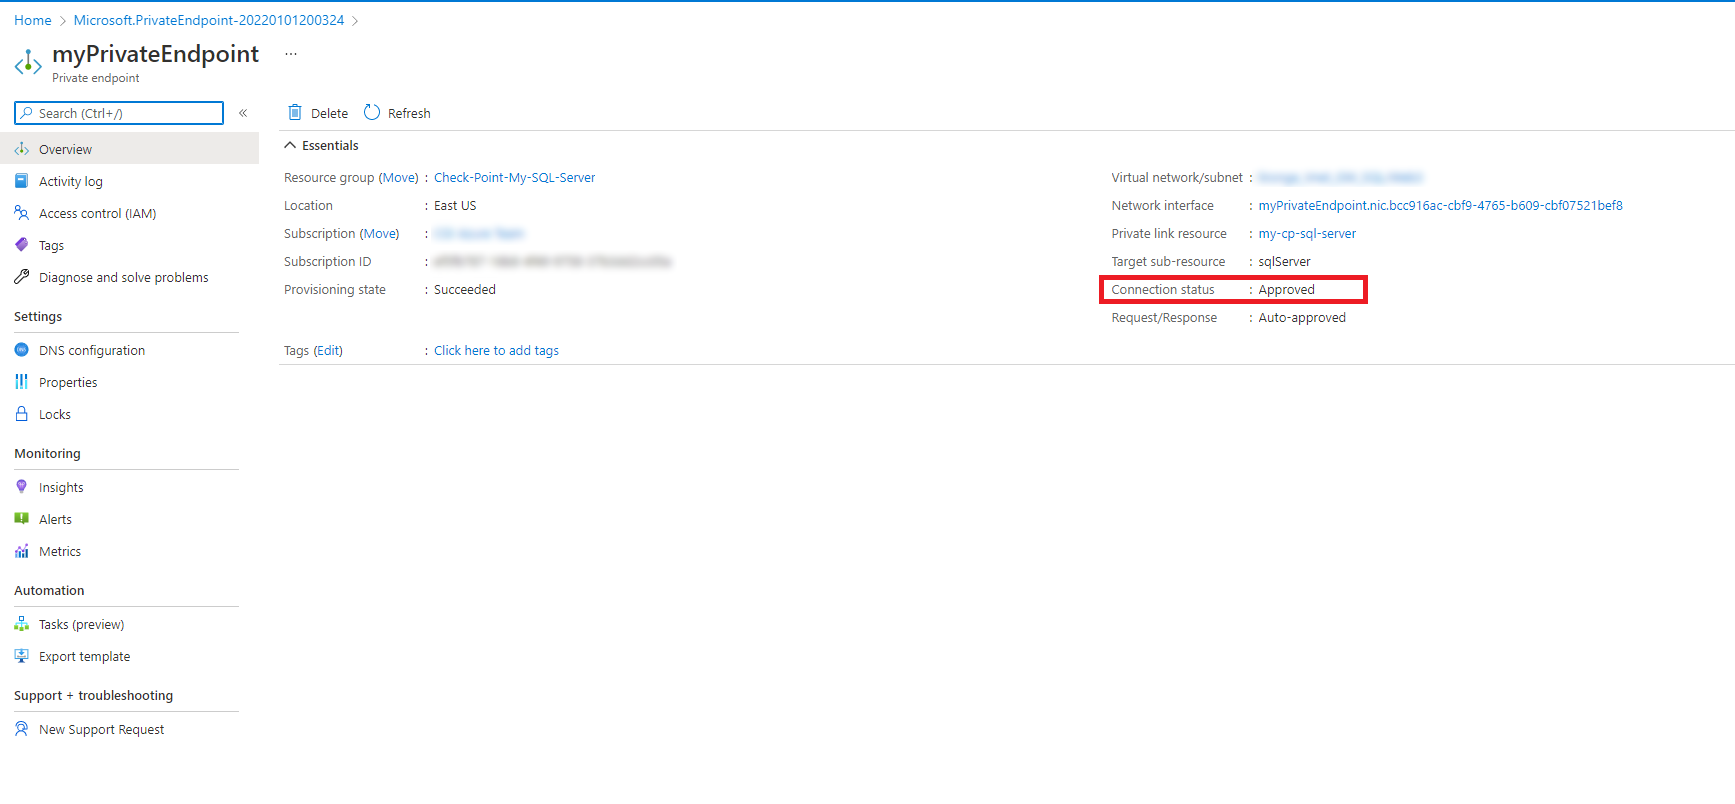
9. When the deployment is completed, enter the private endpoint's resource and make sure the status is Approved:
10. Enter the PaaS resource
11. Make sure the Private Endpoint appears below **Private endpoint connections** :
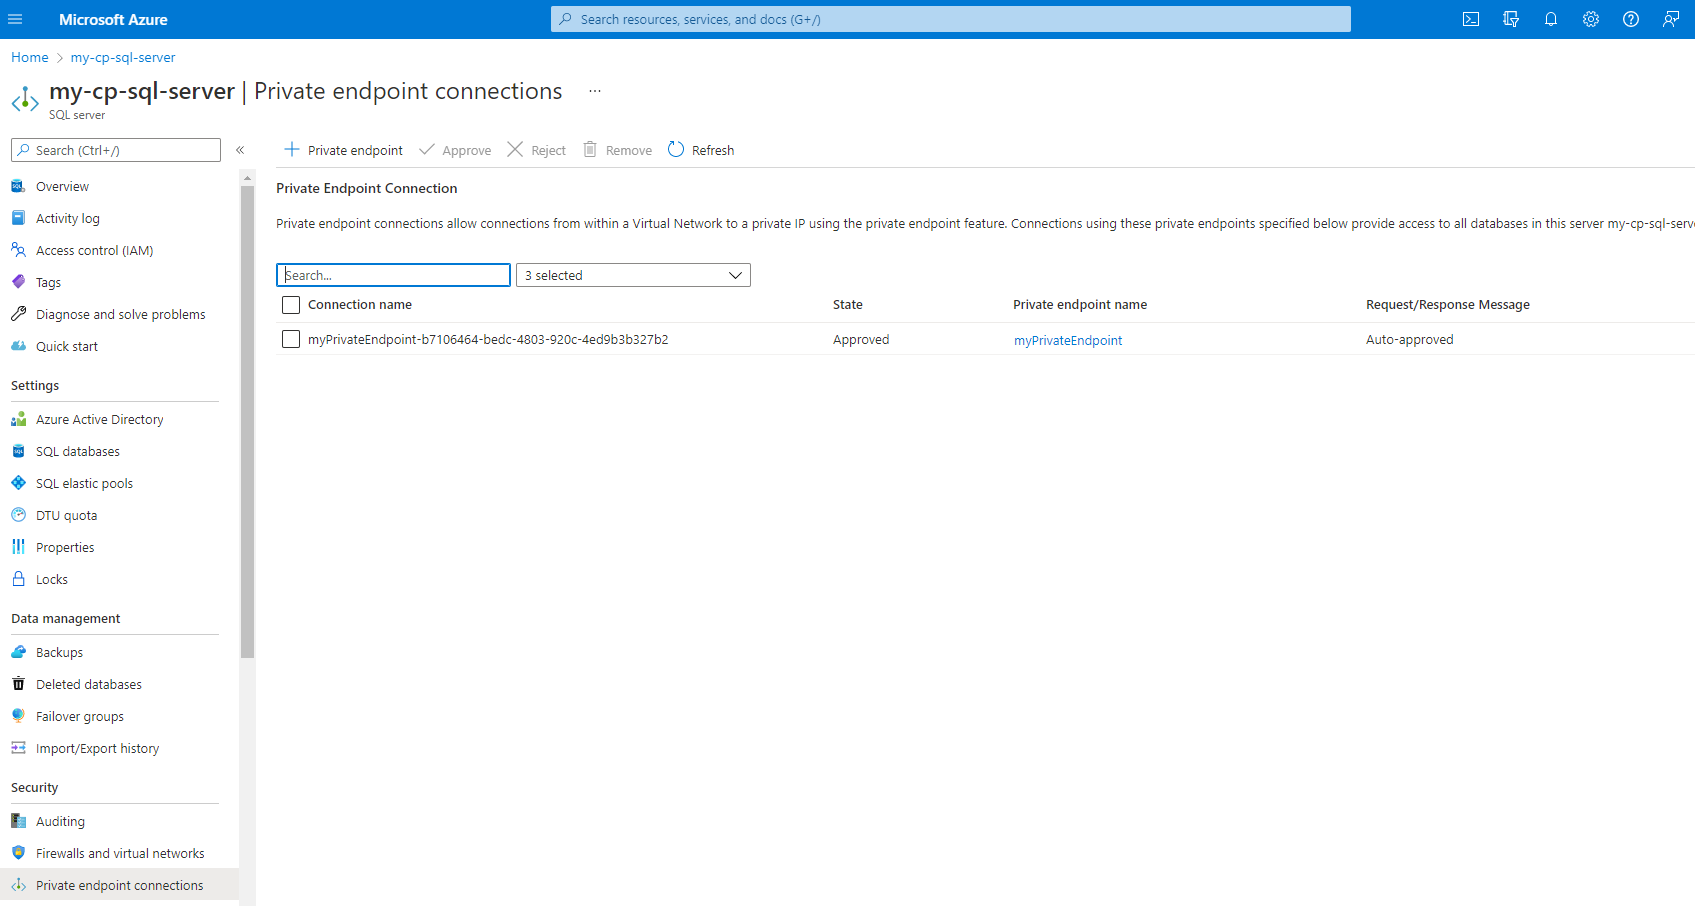
12. Deny public network access below **Firewalls and virtual networks** :

This disables public access to the public FQDN.
13. Click **Save**
(4) Configuring CloudGuard Network products to protect PaaS services {#Configure a secure way}
----------------------------------------------------------------------------------------------
### (4.1) CloudGuard Controller configuration {#Controller configuration}
Show / Hide this section
#### The CloudGuard Controller supports private-endpoint objects and make the configuration easier. {#Toggle_Controller}
#### The private endpoint is supported in the Controller starting the following takes:
* Azure R81.20 and above -- upgrading is unnecessary.
* Azure R81.10 -- minimum requirements: Jumbo hotfix Take 14
* Azure R81 -- minimum requirements: Jumbo hotfix Take 51
* Azure R80.40 -- minimum requirements: Jumbo hotfix Take 140
### (4.2) East-West Traffic {#East-West Traffic}
Show / Hide this section
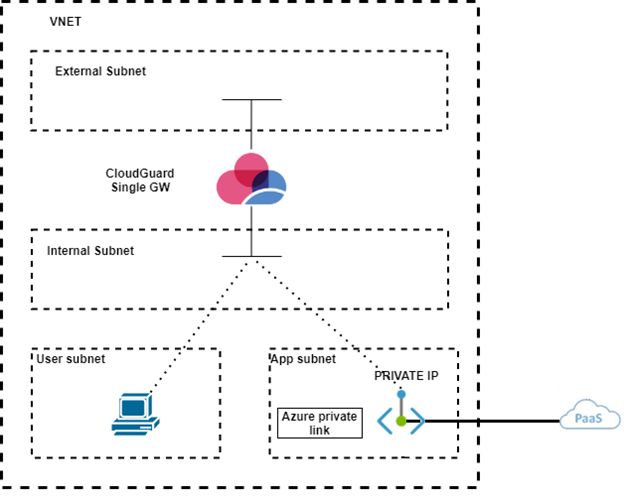
### Background {#Toggle_East_West}
Azure default routes allow direct traffic between subnets.
When a private endpoint is created, Azure creates a system route to its private IP. Therefore, it is necessary to overwrite this route to inspect the traffic and audit logs.
### Configuration
1. **Sanity Check**:
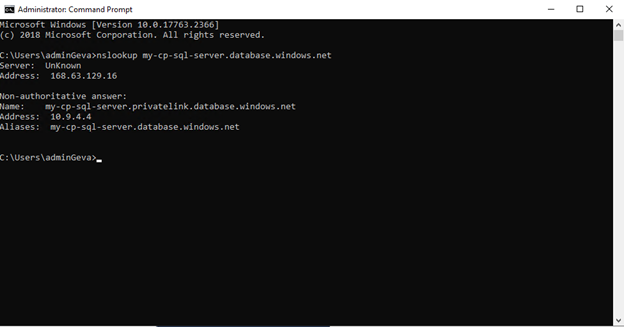
At this time, you can see that all VMs in the VNET are familiar with the new private endpoint private IP.
If you pick a VM and translate your PaaS instance FQDN to an IP address, you should see a private IP address. Try to use "nslookup" with the PaaS instance FQDN.
2. **Add UDR**:
Imply a UDR on the Client subnet from it through the Gateway
1. Look for **Route Tables**:

2. Click **Create**

3. Create it under the resource group that consist the client's subnet:
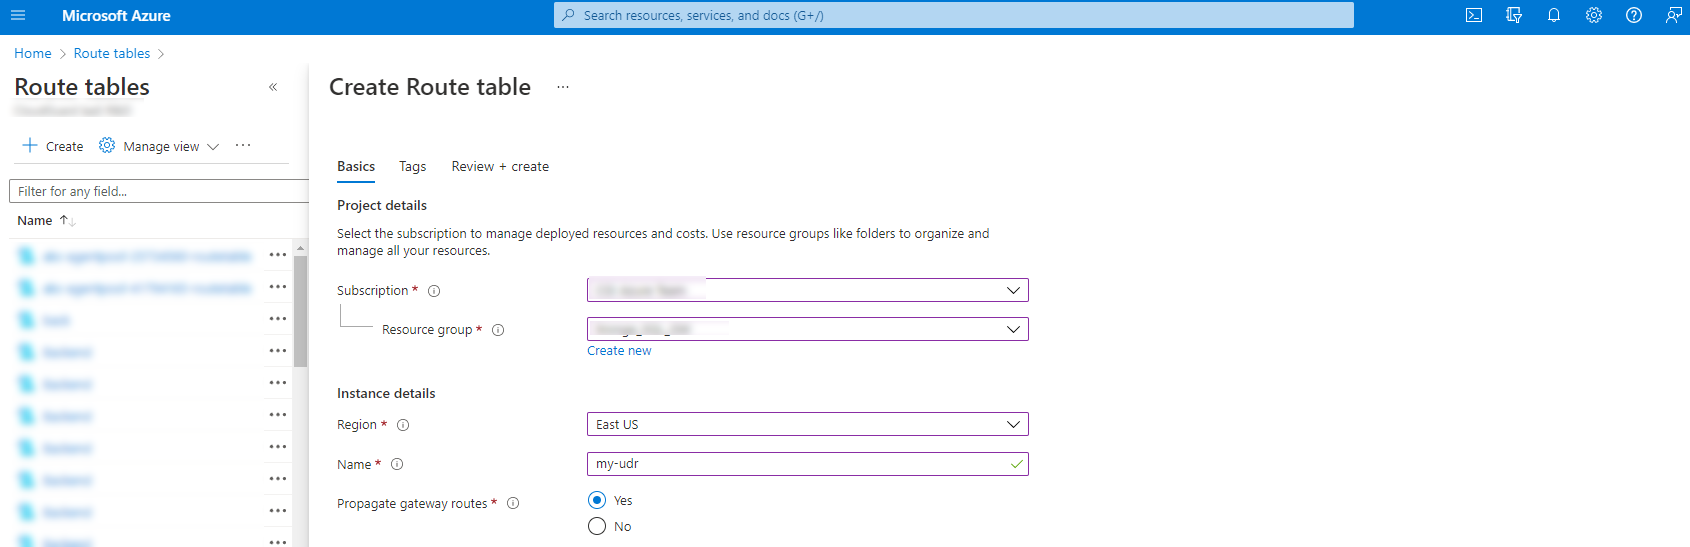
4. Review + Create
5. Go to the Route Table new resource:
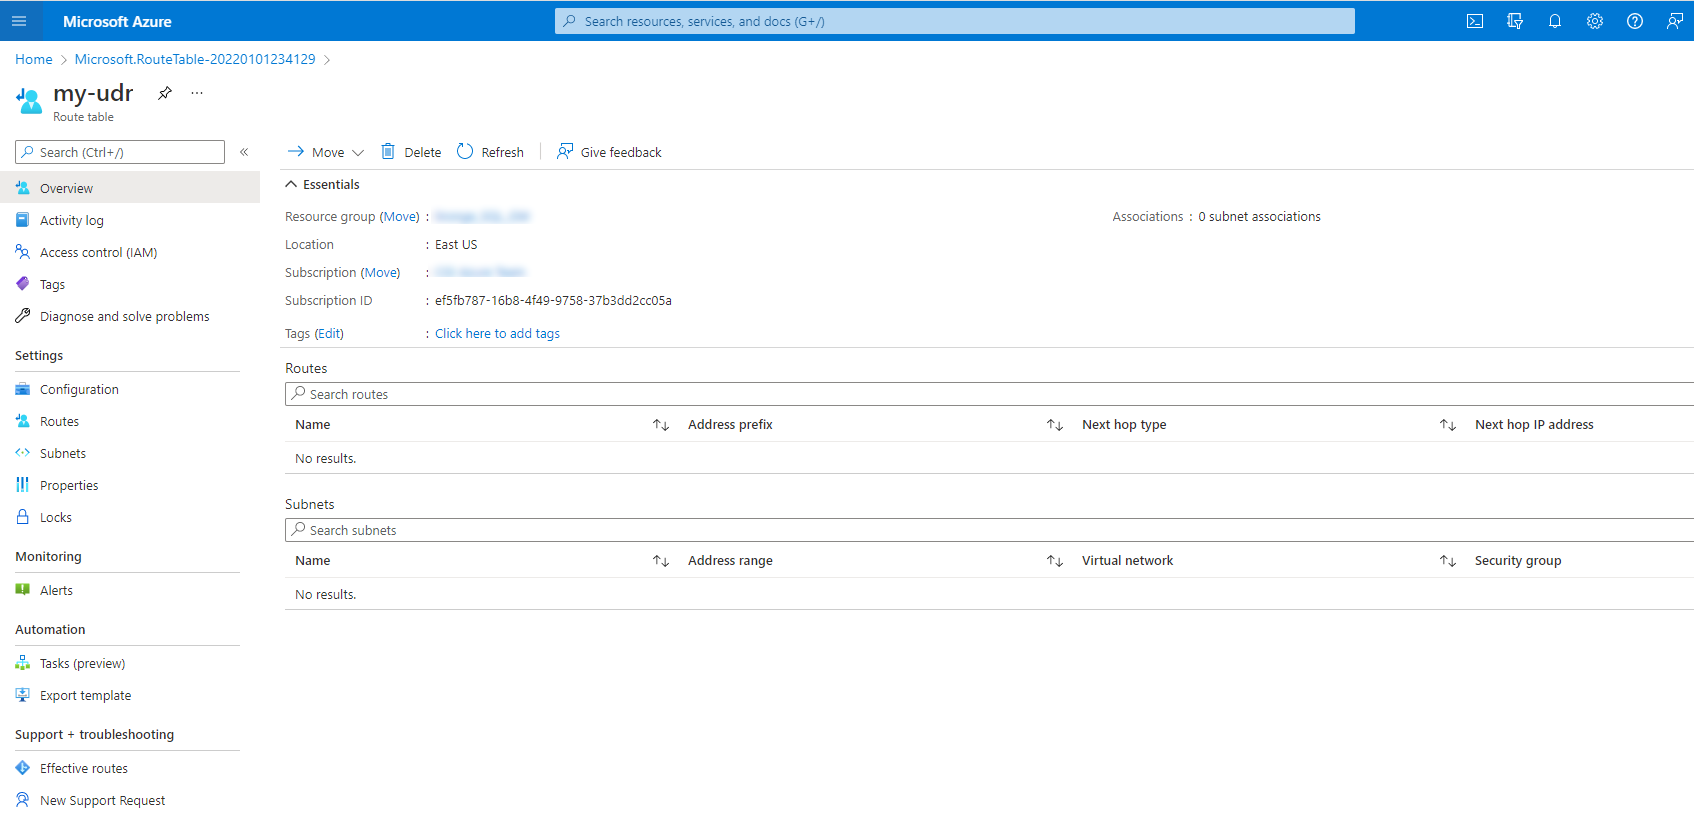
6. Select **Routes**
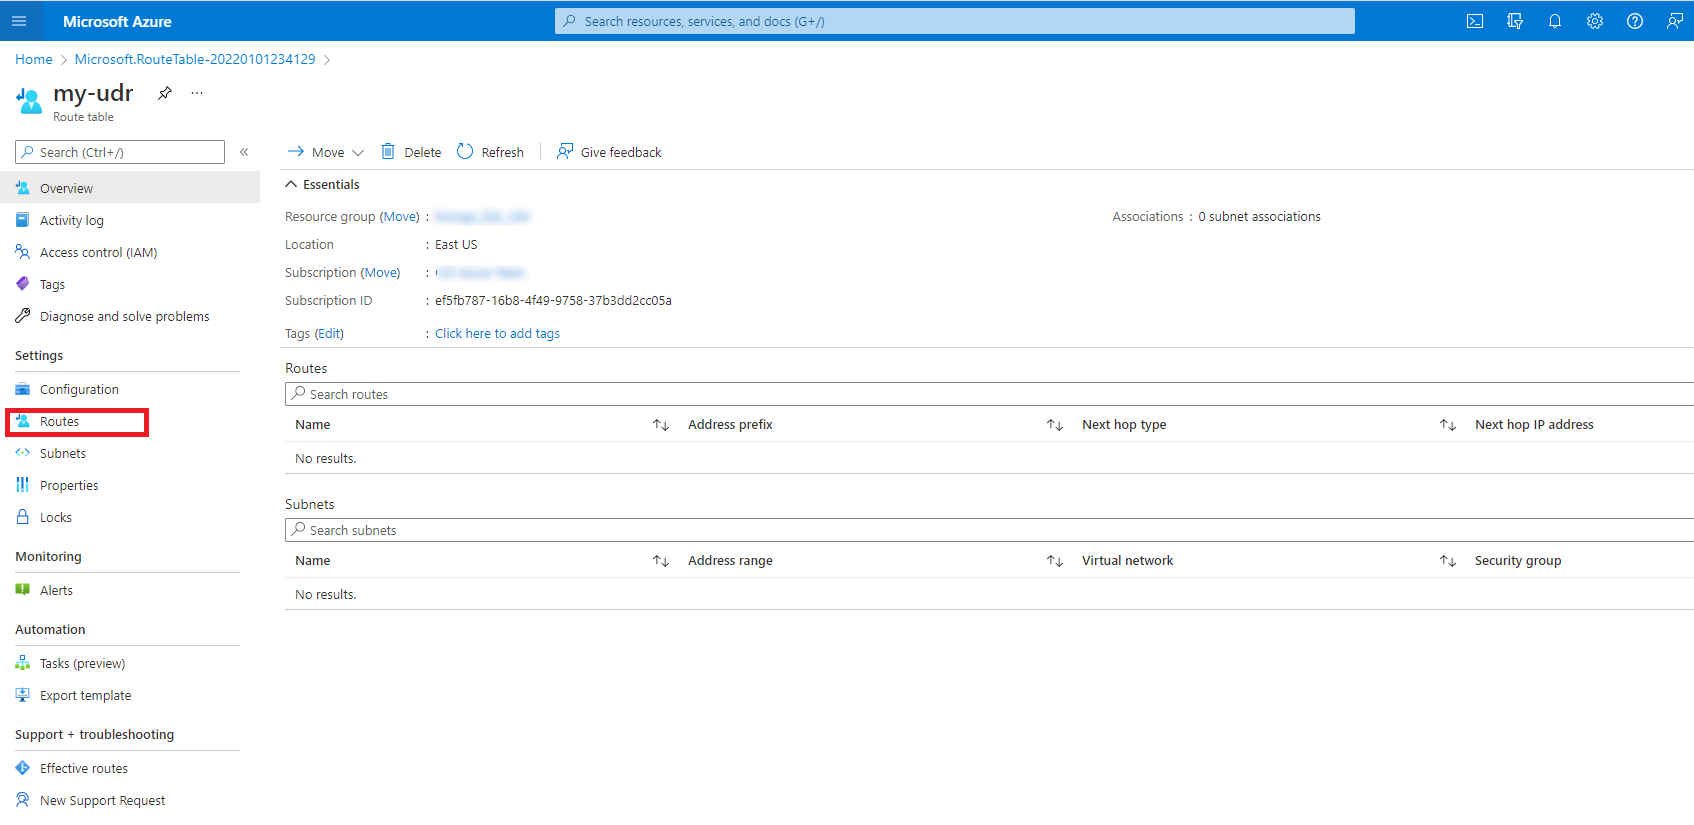
7. Add a new route:

8. Configure a new route rule
**Destination:** PaaS instance's Private Endpoint (Use full subnet /32).
**Next Hop Type:** Virtual appliance **Next Hop IP address:** The NVA - Check Point's Gateway public IP.
For example, for this architecture:
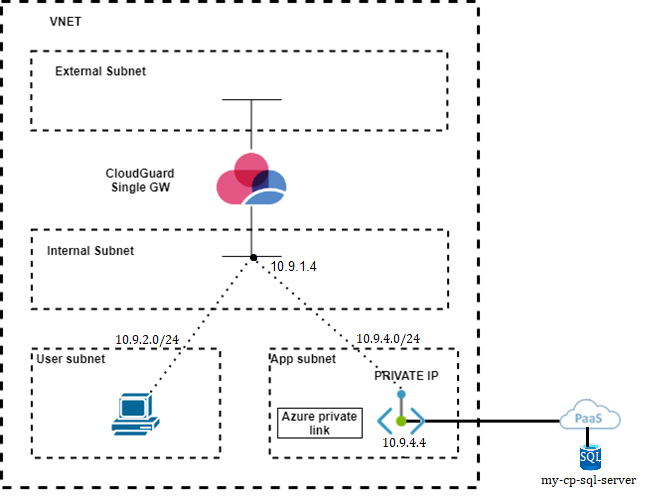
Configure this:
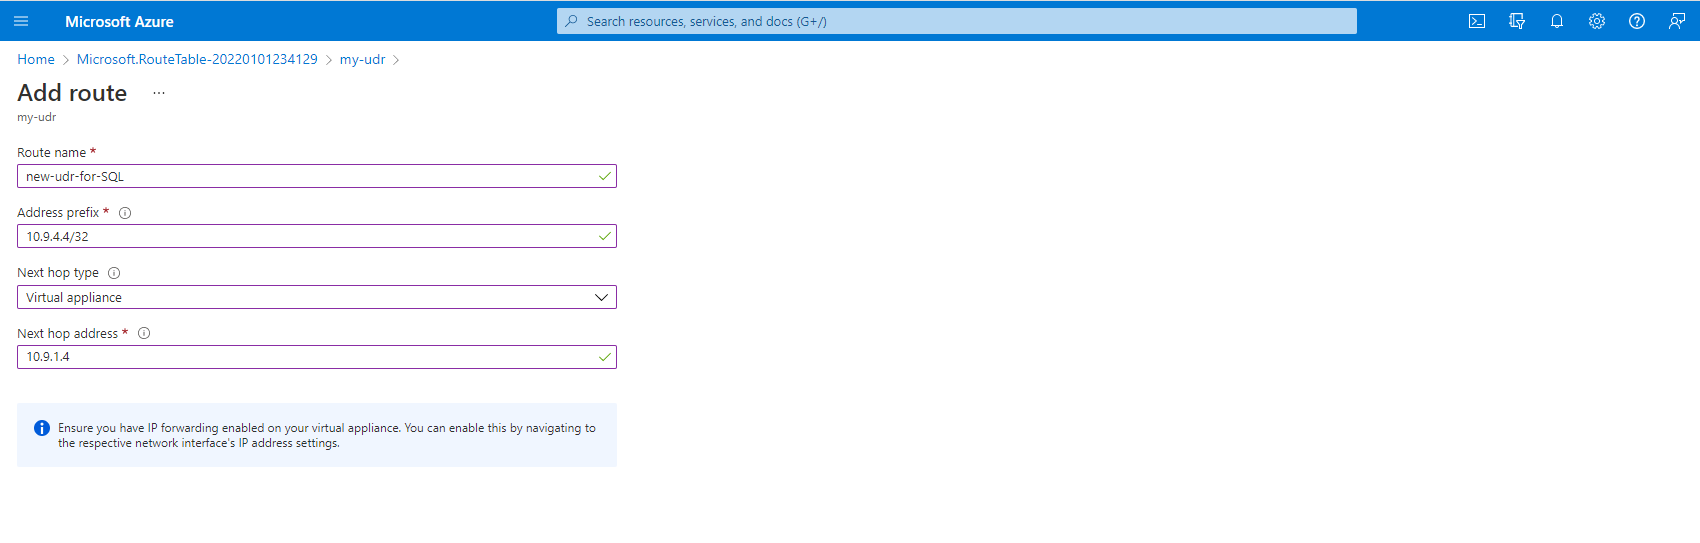
9. Click **OK**.
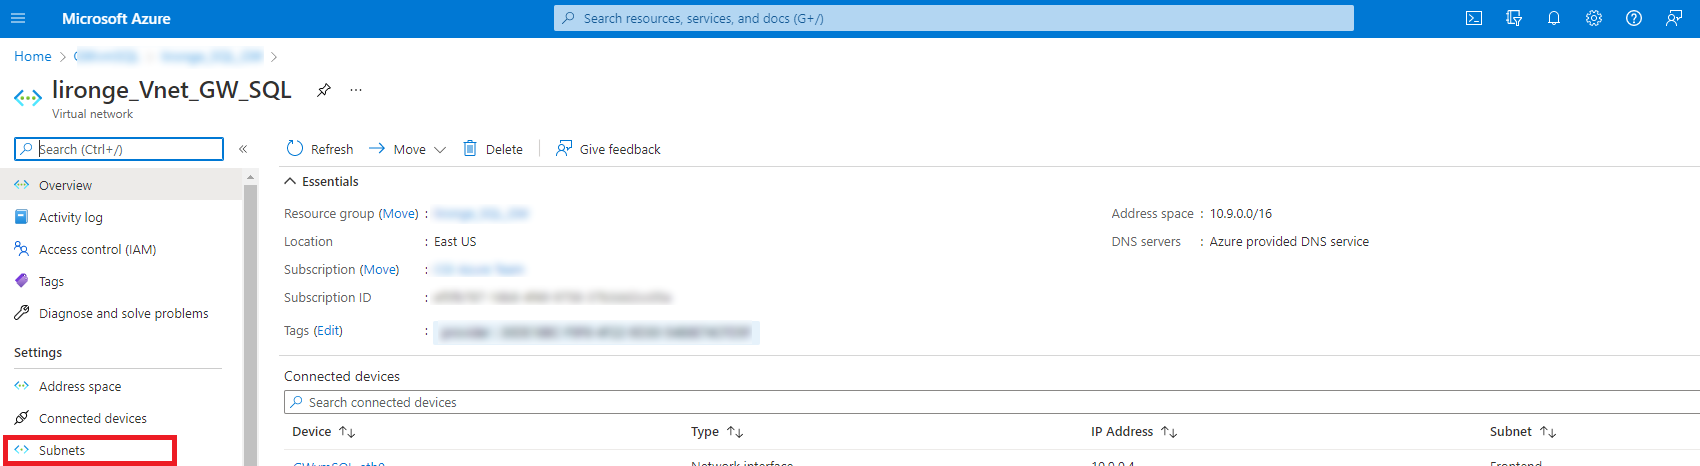
10. Go to the client's VNET resource and click on **Subnets**:
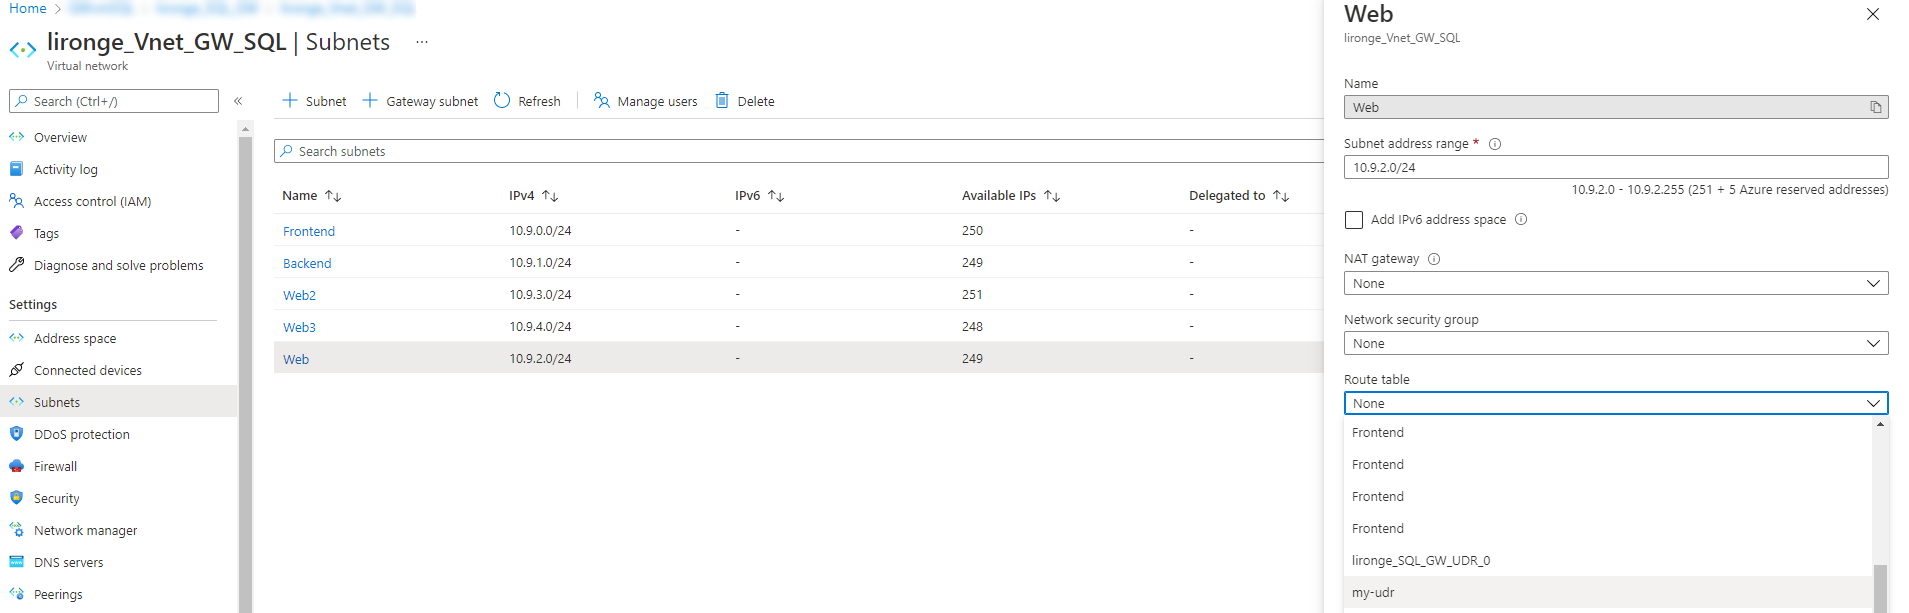
11. Add the Route Table on the client's subnet, and assign it the routing table created above:

3. **Add static-routes on the Gateway**:
Make sure that the Gateway contains static routes for the Client's subnet and for the subnet on which the private-endpoint resides.
Use the command "route".
If static routes are not present, add them:
set static-route \ nexthop gateway address \ priority 1 on
set static-route \ nexthop gateway address \ priority 1 on
In our example, we see these two routes in the Gateway:

4. **Add a Source NAT rule on your Gateway**:
Original Source: \
Original Destination: \
Translated Source: \< HOST-OBJECT-REPRESENTING-THE-GATEWAY-PRIVATE-IP-ETH1\>

### (4.3) Inbound Traffic {#Inbound Traffic}
Show / Hide this section
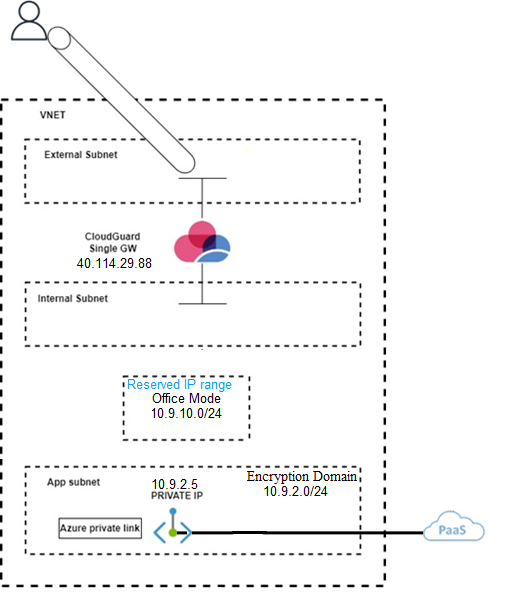
#### Background {#Toggle_Inbound}
This solution involves Remote Access VPN.
**To configure Remote Access VPN to a VMSS:**
Configure CME as explained in the [CloudGuard Network for Azure VMSS R80.10 and Higher Administration Guide](https://sc1.checkpoint.com/documents/IaaS/WebAdminGuides/EN/CP_VMSS_for_Azure/Default.htm) \> Configuration Steps \> Step 14: (Optional) Configure and Deploy the Remote Access VPN Client.
In the example above:
* Office Mode --10.9.10.0/24
* Encryption Domain -- 10.9.2.0/24
**To Configure Remote Access VPN to a Single Gateway:**
1. Enter to SmartConsole's **Gateways \& Servers**:
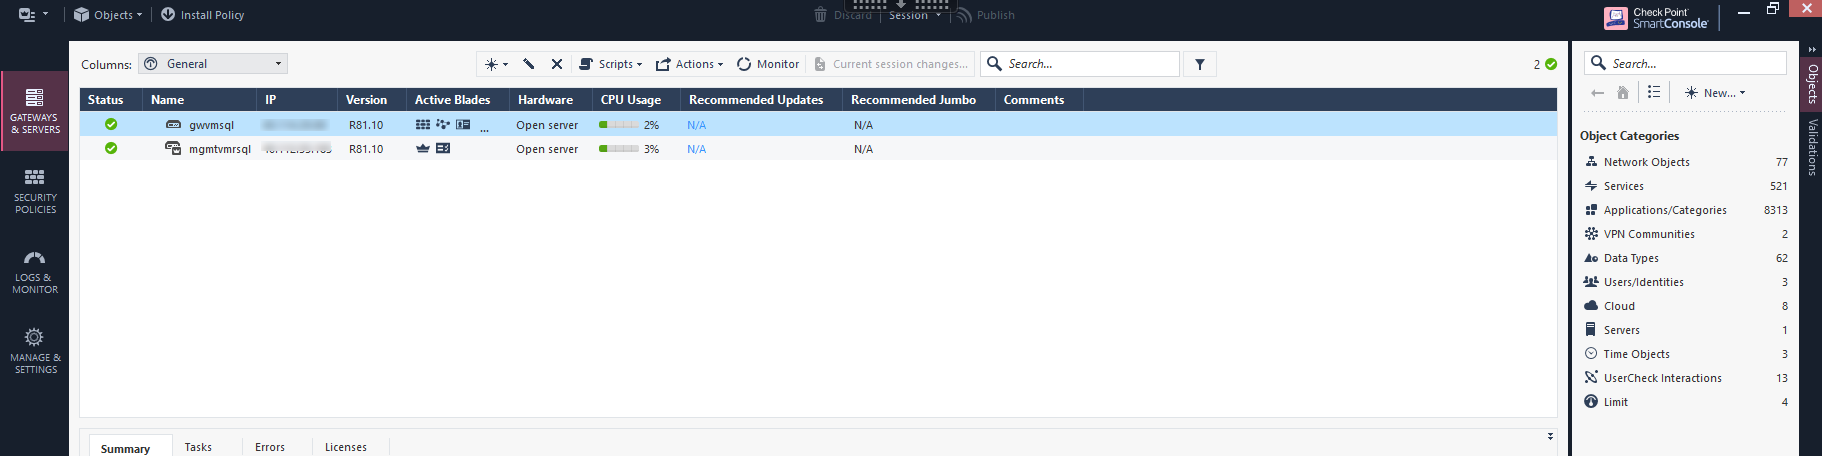
2. Double click on the Gateway object
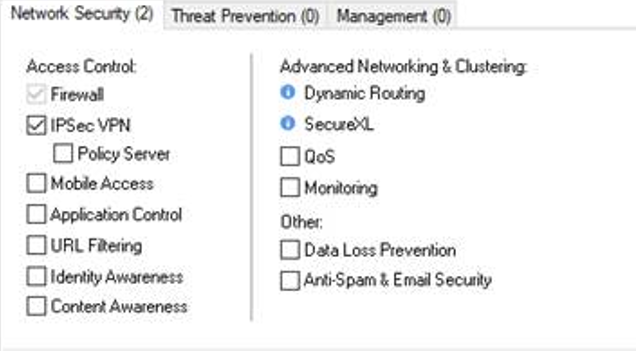
3. Enable IPSec VPN blade in Gateway creation main page
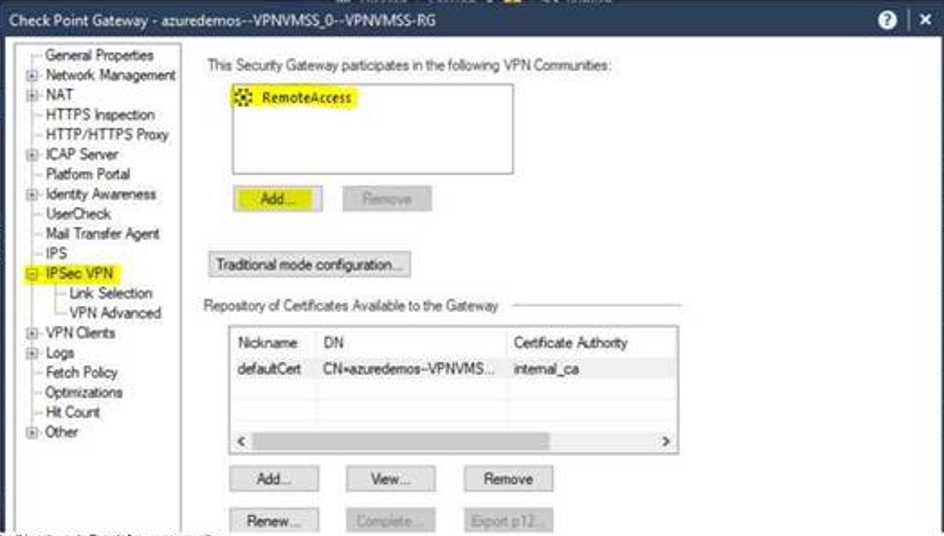
4. Add the Gateway to RemoteAccess VPN community
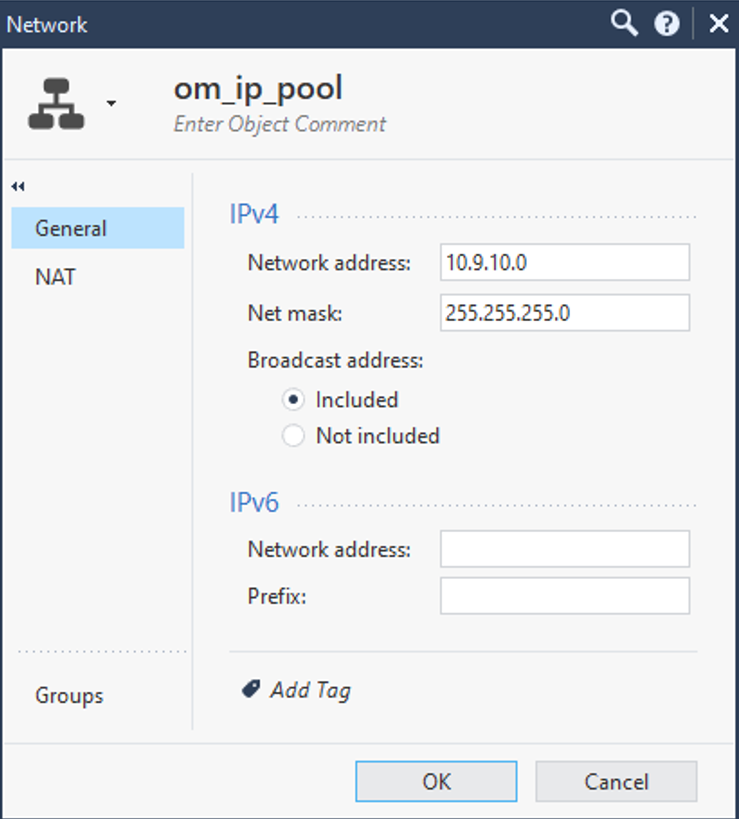
5. Set Office Mode - static office-mode pool with "hide behind Nat":
1. This is a network that is not currently used (nor in the future).
2. The users who will use this remote access VPN will get a private IP from this scope
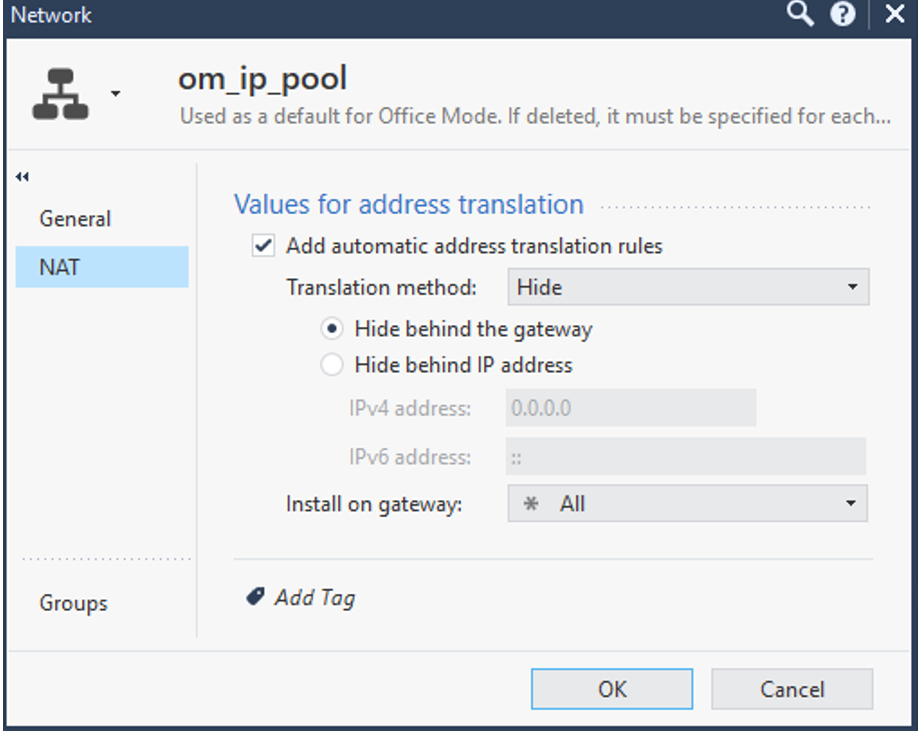
3. Make sure to hide those IP addresses behind the Gateway's IP:
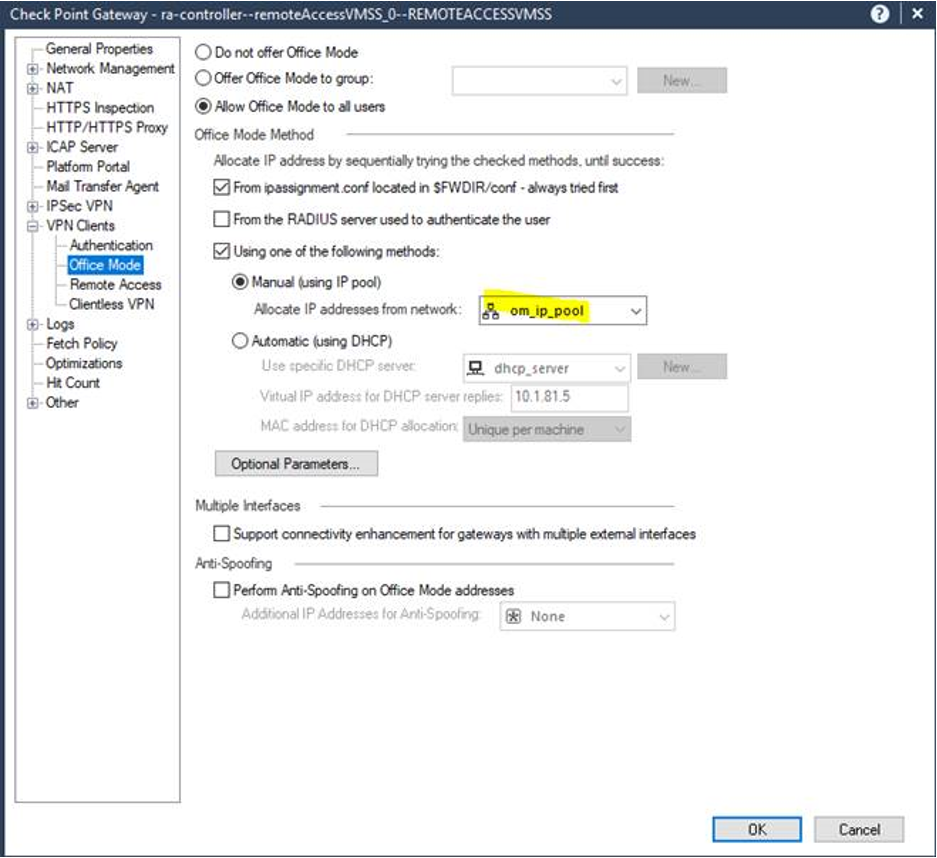
6. Set the pool in the Gateway's object -\> VPN Clients -\> Office Mode:
1. Allow Office Mode to all users
2. Add static office mode pool
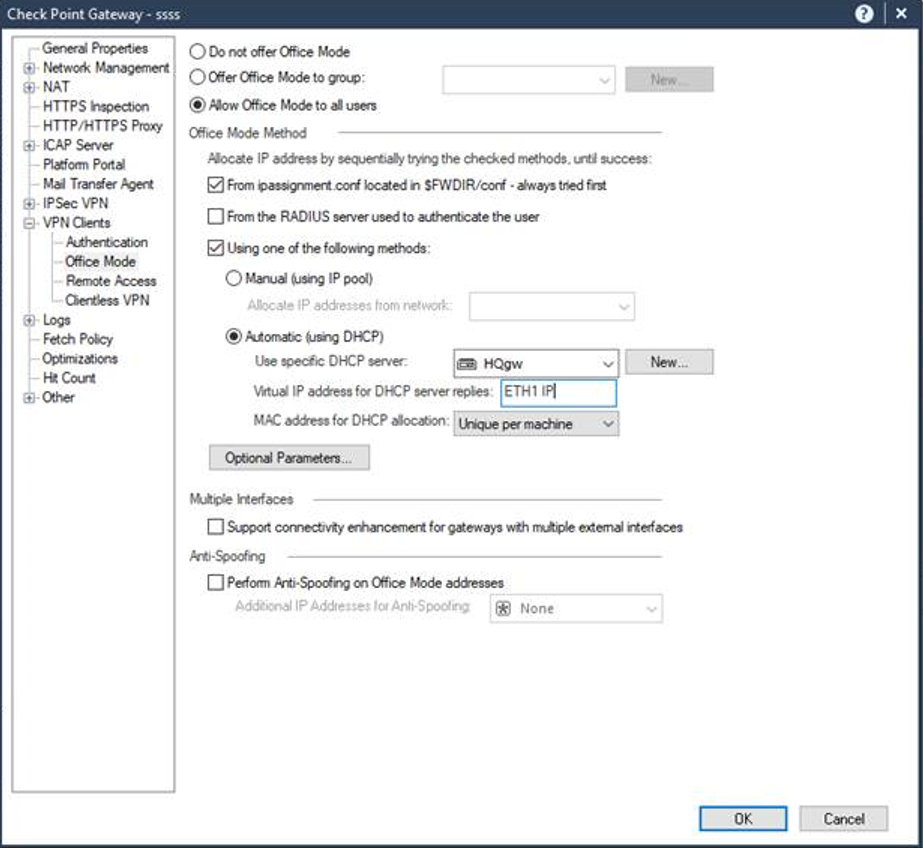
7. Alternative for static office mode pool -- Automatic DHCP
1. Allow Office Mode to all users
2. Add automatic DHCP
3. Virtual IP address for DHCP server replies should be the internal NIC of the Gateway
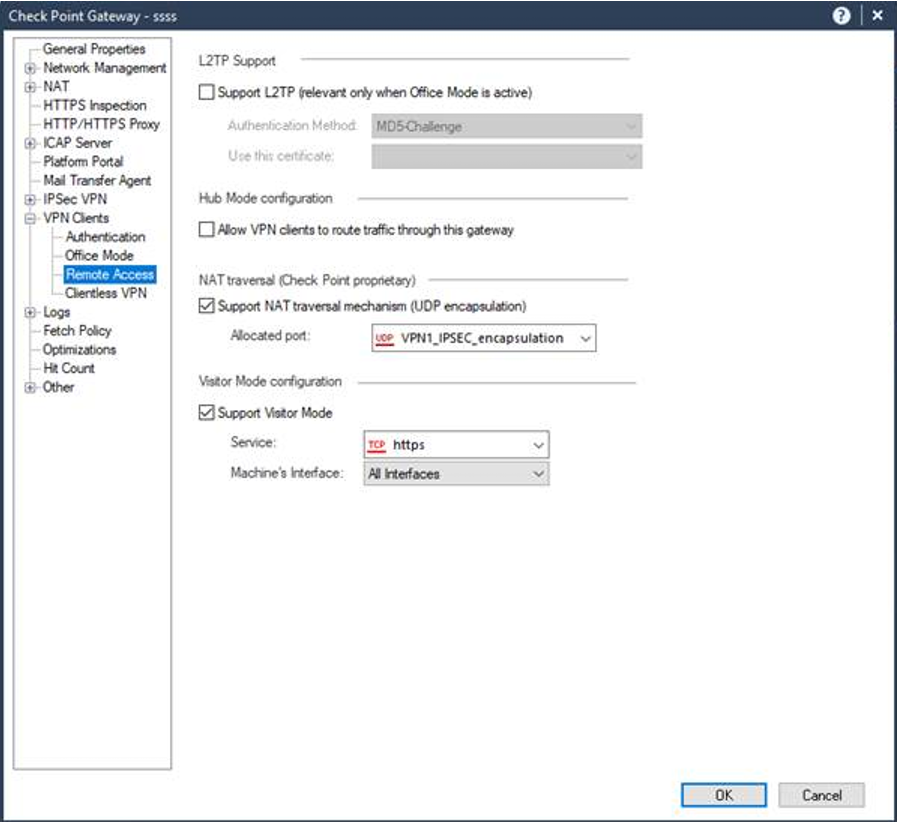
8. If you use a version lower than**R81.10**:
In Remote Access need to set the Support Visitor Mode
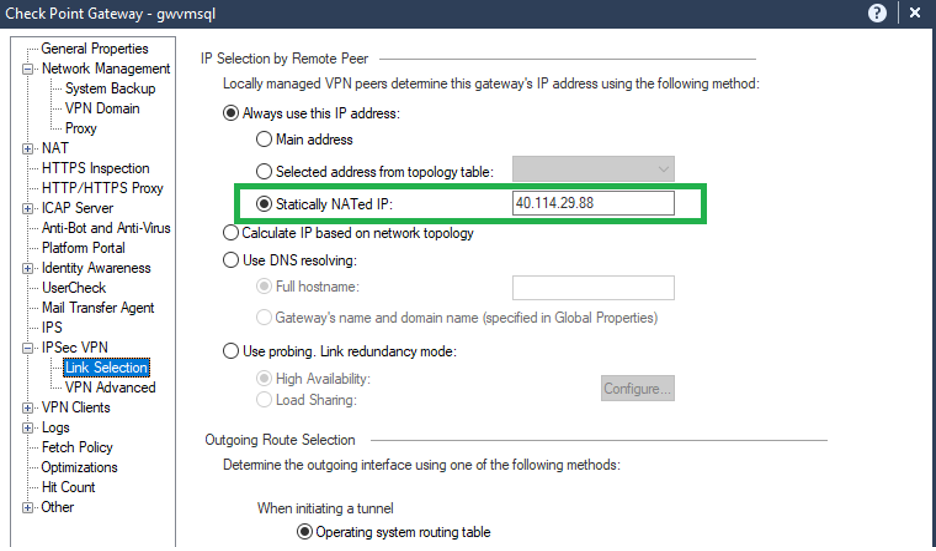
9. Setup Link selection properly (needed in Public Cloud)
Statically NATed IP: The Gateway public IP
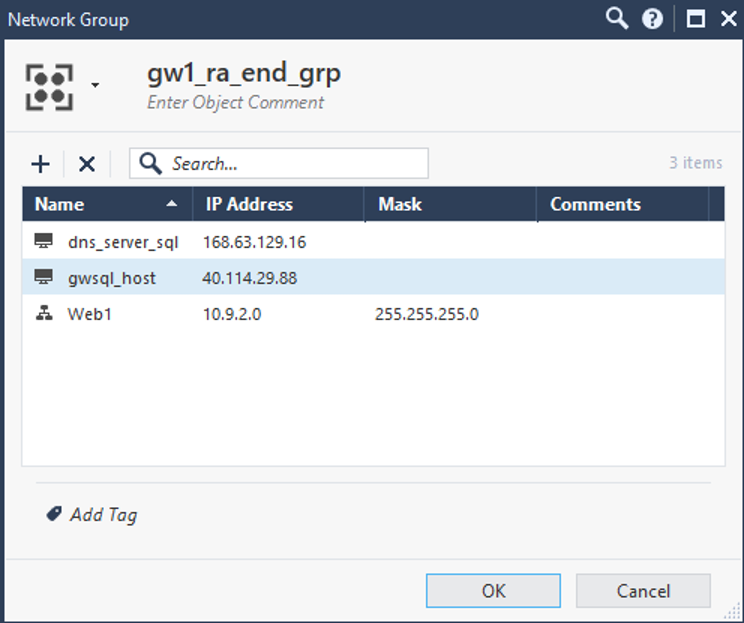
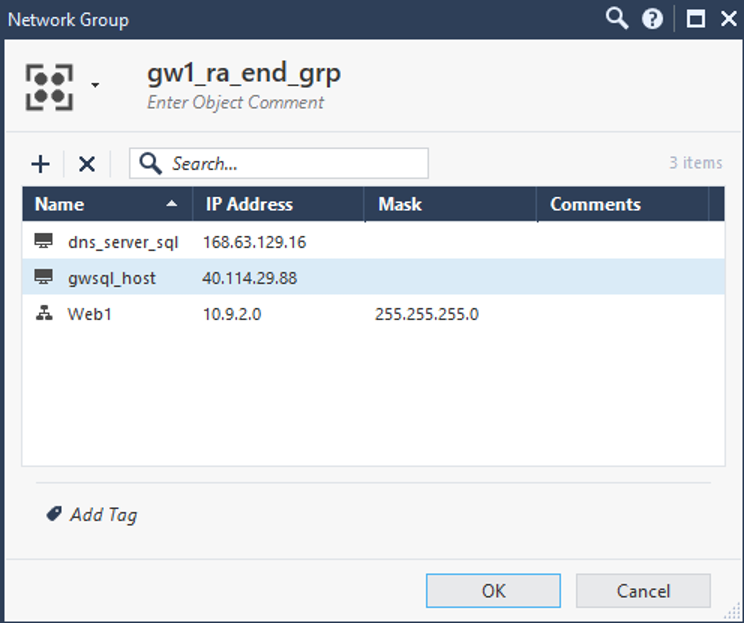
10. Create a network group consisting of:
1. The client's subnet - internal network of the Gateway
2. Public IP of the Gateway (as type: host)
3. The private DNS server: 168.63.129.16
**Note:** This IP enables communication with the DNS virtual server to provide filtered name resolution to the resources (such as VM) that do not have a custom DNS server.
This unique public IP address is owned by Microsoft and will not change.
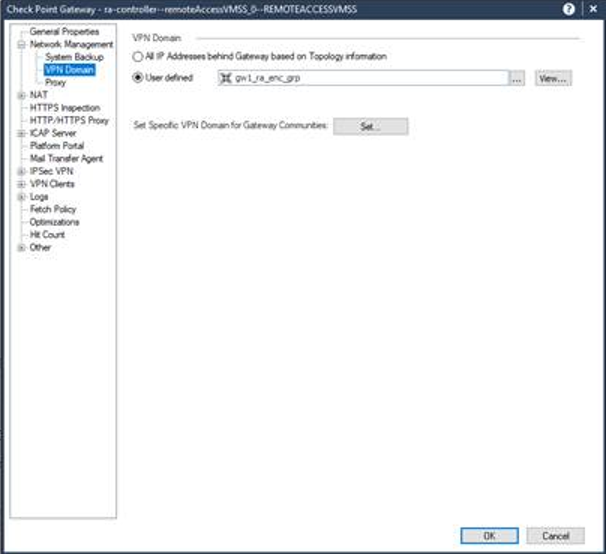
11. Set it as the VPN domain:
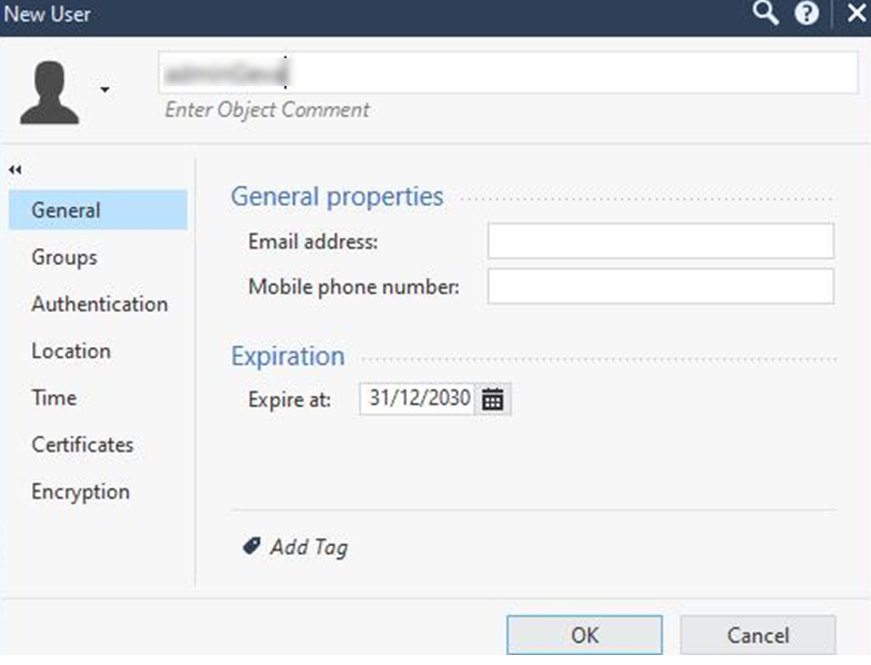
12. Configuring a VPN Client
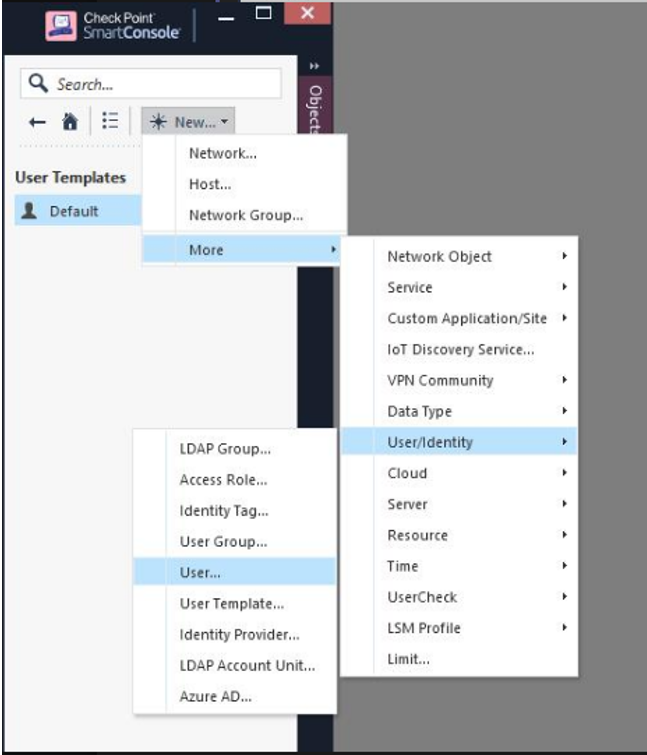
13. Select default

14. Enter username:
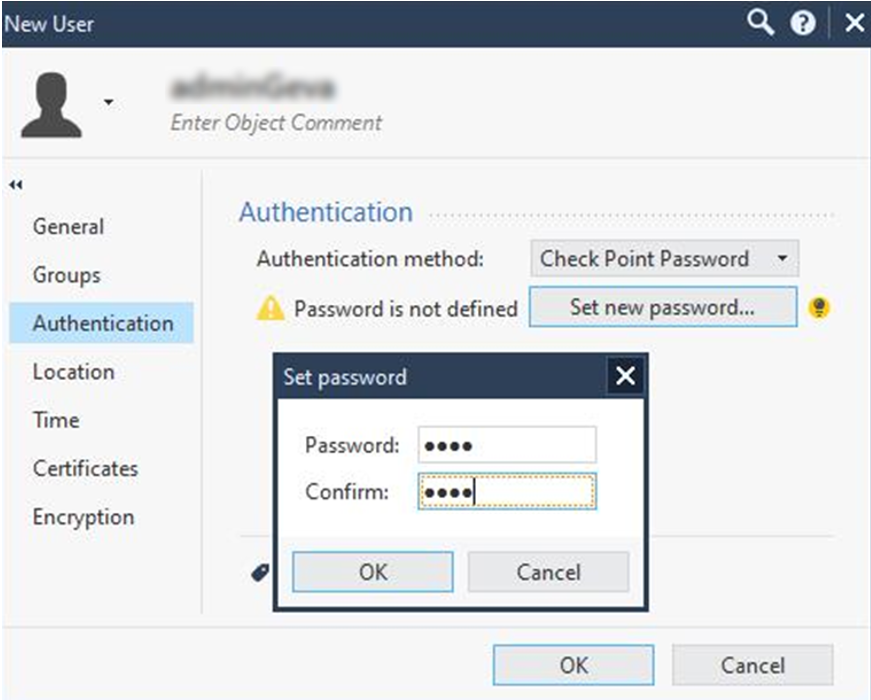
15. Set Password:
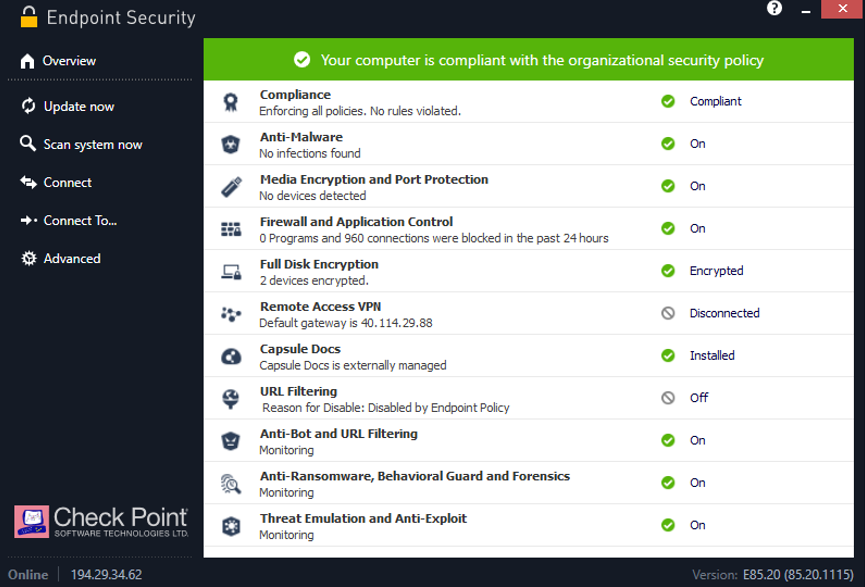
16. Enter Check Point's Endpoint Security:
17. Select **Remote Access VPN** and enter user details you configured:
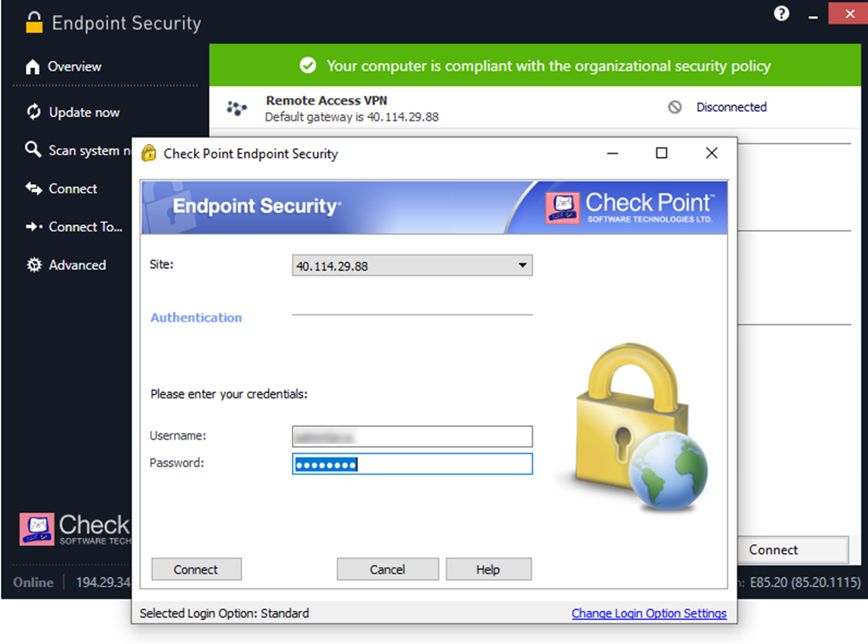
Now you can log in to your PaaS instance.
(5) Limitations {#Limitation}
-----------------------------
Show / Hide this section
1. Source NAT must be used (in West-East traffic)
2. UDR and NSG configurations don't have effects on private endpoints.
3. UDR implemented on user/client subnet must use the private endpoint IP address as destination (a.b.c.d/32)
4. You can not configure more than one PaaS instance to the same private endpoint.
5. A PaaS instance can be attached to multiple private endpoints; therefore, it is essential to make sure that other private endpoint access if configured, is inspected.
---
# Agent Instructions
This content is from the Check Point Support Center (https://support.checkpoint.com), the official knowledge base for Check Point cybersecurity products.
## Navigating This Knowledge Base
- **Complete index**: [llms.txt](https://support.checkpoint.com/llms.txt)
- **All SK articles**: [SecureKnowledge Sitemap](https://support.checkpoint.com/sitemaps/secureknowledge-sitemap-index.xml)
- **SK article URL pattern**: `https://support.checkpoint.com/results/sk/{skId}`
- **Markdown responses**: AI bot User-Agents automatically receive `text/markdown` content