> Source: [sk149253](https://support.checkpoint.com/results/sk/sk149253)
# sk149253 - How to generate and install a 3rd party IPSec Certificate
| Property | Value |
|----------|-------|
| Solution ID | sk149253 |
| Date Created | 2019-04-16 |
| Last Modified | 2022-11-24 |
| Technical Level | General |
| Products | Security Gateway |
| Versions | R81.20, R81.10 (EOS), R81 (EOS) |
## Solution
### Generate and install a third-party IPSec Certificate
1. Check with your Certificate Authority and get the CA (root) certificate **and** the intermediate certificate.For instance: if the third-party Trusted Certificate is from **Entrust** get the Root and Intermediate Certificates first.
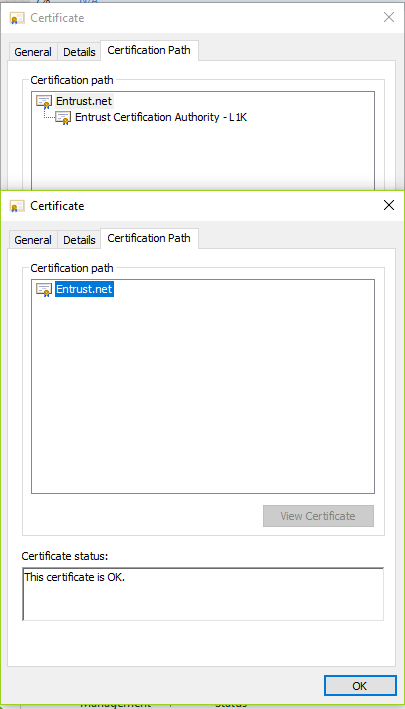
2. As you can see, the Root is **Entrust.net** and the Intermediate is **Entrust Certificate Authority -- L1K** . Accordingly, we will install the Root Certificate as a **Trusted CA** and the Intermediate Certificate as a **Subordinate CA**.
3. Go to **SmartDashboard** . Click on **\*New** and then click on **More** . Find the **Server** option, click on **More** , and choose **Trusted CA**.
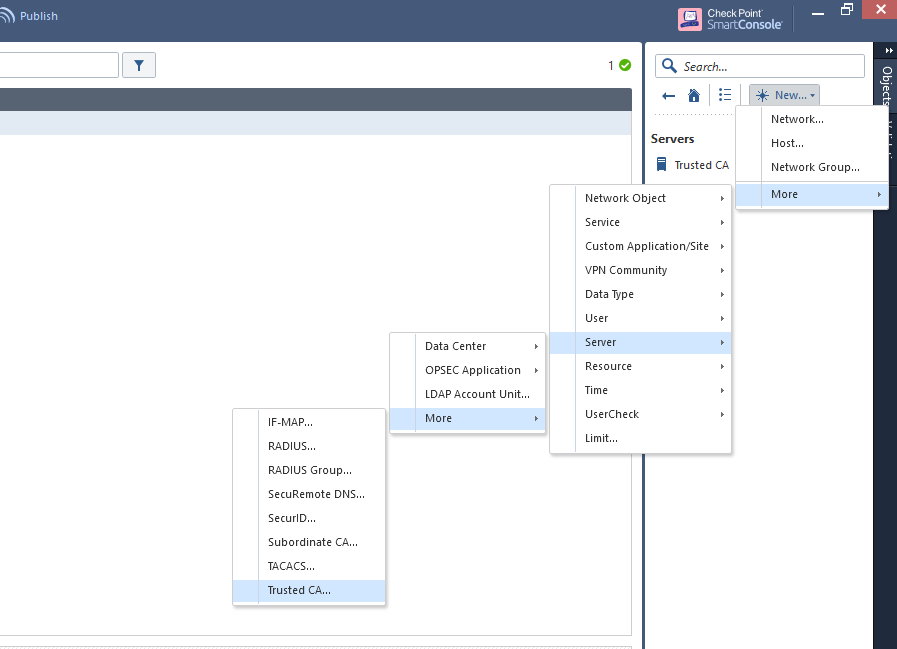
4. After you choose **Trusted CA**, a dialog box appears.
5. Give the **Trusted CA** a name (for example: **Root CA** or **GodaddyCA**).
6. Select the **OPSEC PKI** option and click on **GET**.
7. A Windows dialog box appears. Choose the desired Root CA certificate.
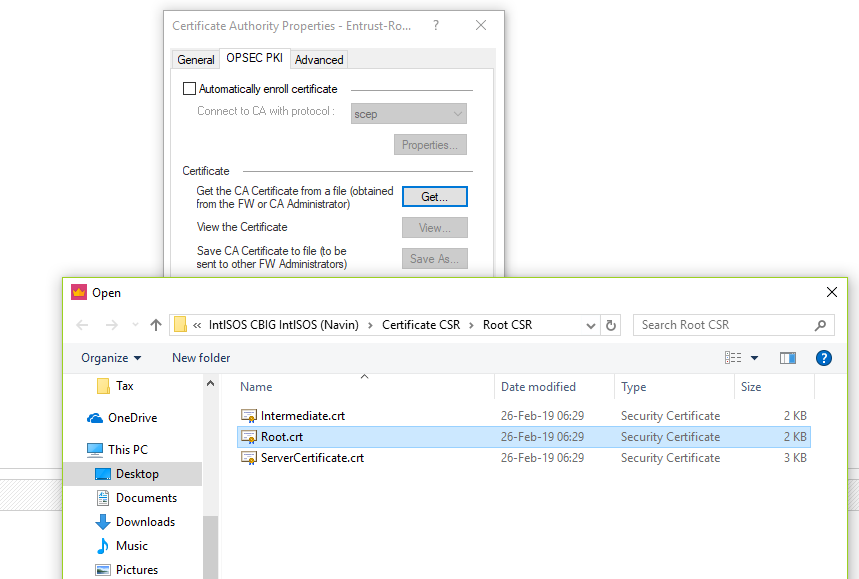
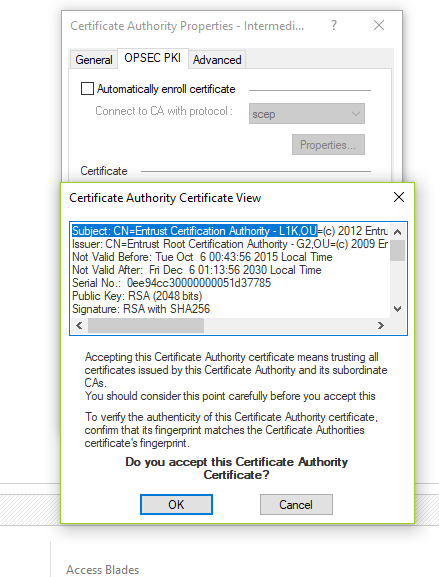
8. After you choose the certificate, you are prompted to accept the certificate, as seen below:
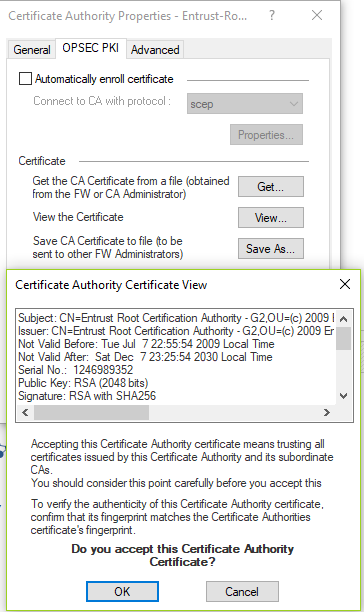
9. Install the **Intermediate Certificate** as a **Subordinate CA**.
10. Go to SmartDashboard. Click on **\*New** . Then click on **More** and find the **Server** option. Click on **More** and choose **Subordinate CA**.
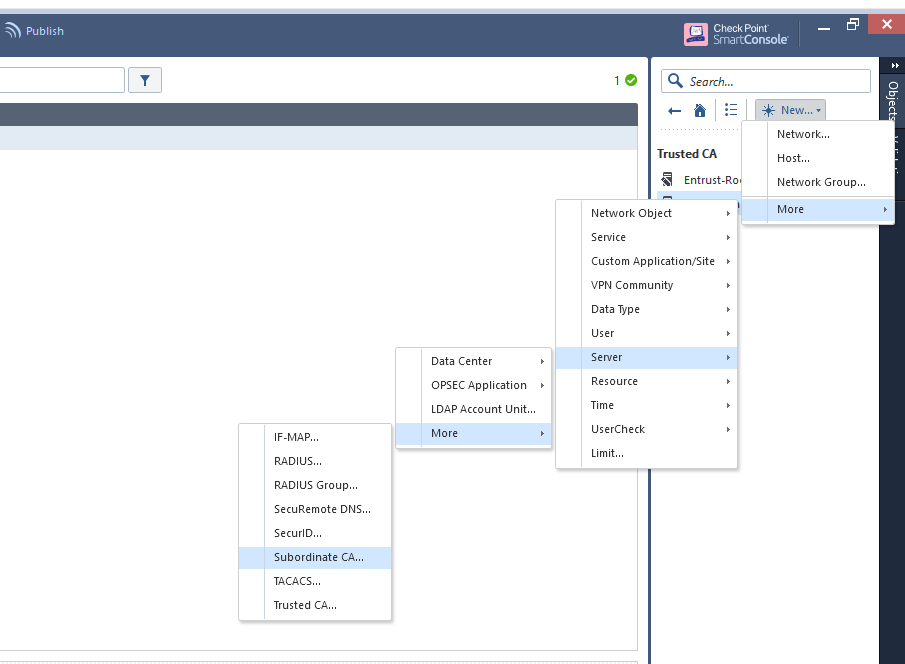
11. After you choose **Subordinate CA**, a Dialog Box appears. (Do the same steps as for the Root CA.)
12. Name the **Subordinate CA** (for example:**Intermediate CA** or **Godaddy-inter ca**).
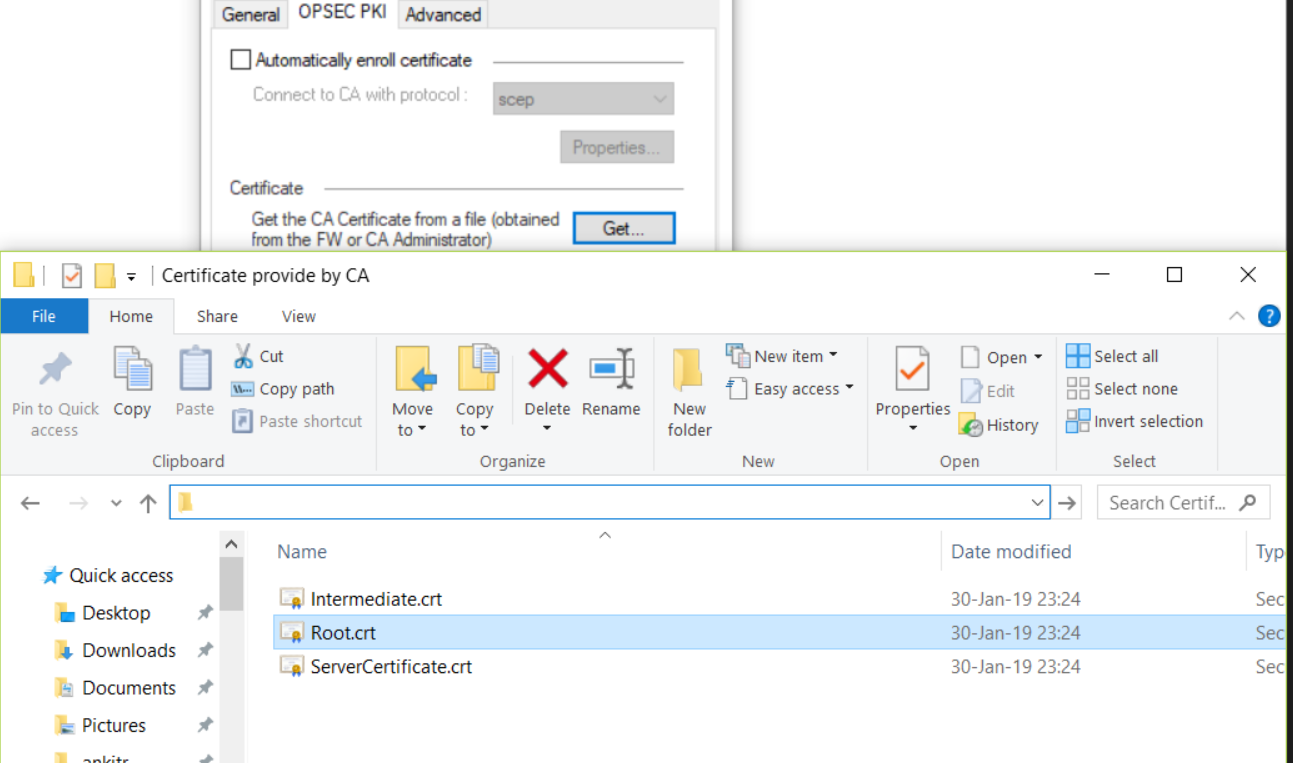
13. Accept the prompt, select the certificate from step 13:
14. The Intermediate and Root CA certificates are available under the Server's section of the object tree:
Go to **SmartDashboard** \> **Object Tree'** and click on**Servers**.
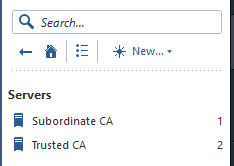
15. You have now successfully installed the certificate. You can generate the CSR, as shown below:
Under 'SmartDashboard \> click on a Particular Gateway object \> click on IPSec VPN'. Then click on ADD and choose the Relevant Certificate through which you would like to generate the CSR.
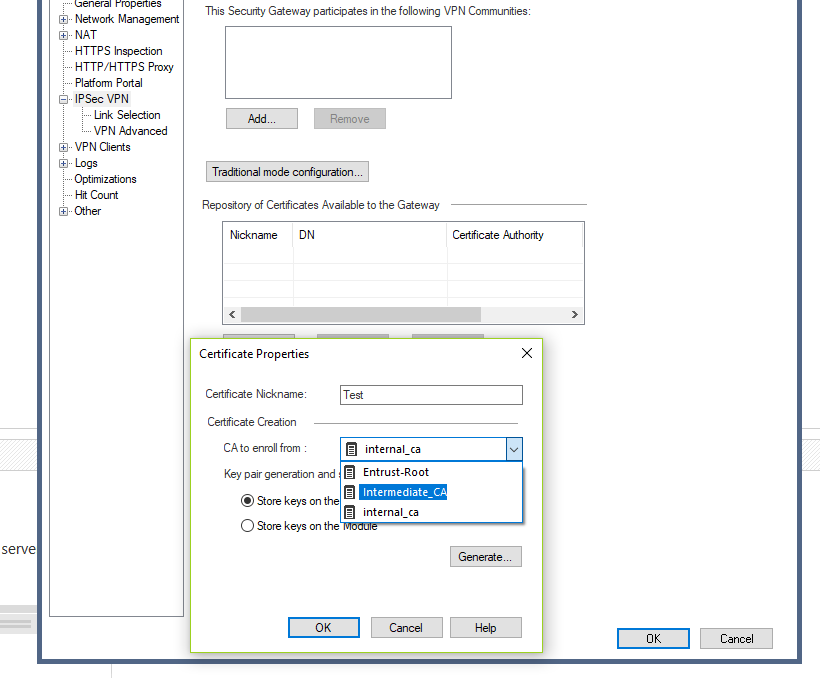
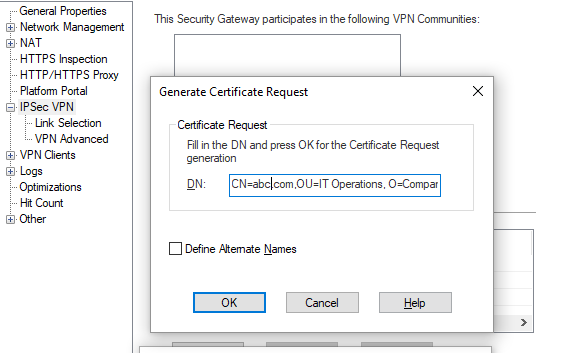
16. If this is a new Certificate request, the general format for the DN is as follows:
CN=domain.com
OU=Group name (example: IT Operations)
O=Company Name (example: Check Point) or (example: Check Point\\, Ltd)
L=Location/City information
ST=State (DO NOT USE "s=")
C=Country (example: US)
(Example: "**CN=abc.com,OU=IT Operations, O=Company Name, L=City, ST=State, C=US**")
17. After you generate the CSR, you will find the certificate under the IPSec repository -\> Click on **View** . Then click on **Save to File**.
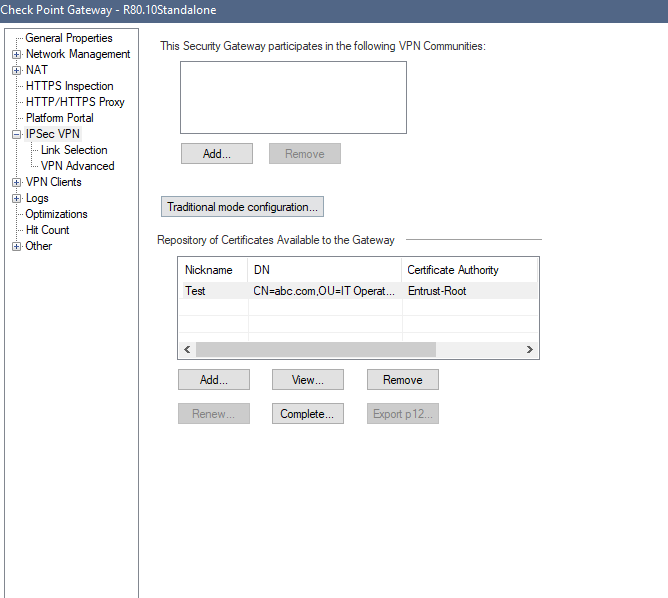

18. After you generate the CSR, you can export it (it will be a .req file) and submit it to the third party. When you get the file back from the third party, save the file, and then go back to the **Gateway properties** window \> **VPN** \> select the certificate, and click **Complete** .
Select the signed CSR and click **Open** . Review the details of the certificate. It should be signed by the same (Root) CA and intermediate CA/Direct CA. Otherwise, it displays an error. For more information, refer to [sk60223: How to fix "The direct CA certificate in the received chain doesn't match the CA certificate for which you created the certificate request"](https://supportcenter.checkpoint.com/supportcenter/portal?eventSubmit_doGoviewsolutiondetails=&solutionid=sk60223)
After the certificate is installed, click **OK** and install the policy. The SSL certificate will be installed on the Gateway.
Related Solutions:
* [sk103886 - When trying to renew 3rd Party certificate from IPsec repository, error received "Certificate with same DN ( Domain Name ) already exists on XXXX"](https://supportcenter.checkpoint.com/supportcenter/portal?eventSubmit_doGoviewsolutiondetails=&solutionid=sk103886&partition=Expert&product=IPSec)
---
# Agent Instructions
This content is from the Check Point Support Center (https://support.checkpoint.com), the official knowledge base for Check Point cybersecurity products.
## Navigating This Knowledge Base
- **Complete index**: [llms.txt](https://support.checkpoint.com/llms.txt)
- **All SK articles**: [SecureKnowledge Sitemap](https://support.checkpoint.com/sitemaps/secureknowledge-sitemap-index.xml)
- **SK article URL pattern**: `https://support.checkpoint.com/results/sk/{skId}`
- **Markdown responses**: AI bot User-Agents automatically receive `text/markdown` content