> Source: [sk101361](https://support.checkpoint.com/results/sk/sk101361)
# sk101361 - "Failed to get license or invalid license on Server. Exiting..." error in SmartEvent GUI or SmartEvent NGSE GUI
| Property | Value |
|----------|-------|
| Solution ID | sk101361 |
| Date Created | 2014-06-18 |
| Last Modified | 2025-06-17 |
| Technical Level | General |
| Products | Security Management Server, Licensing |
| Versions | R82.10, R82, R81.20, Not Version-Specific, R82.20 |
| OS | Windows, Gaia |
## Symptoms
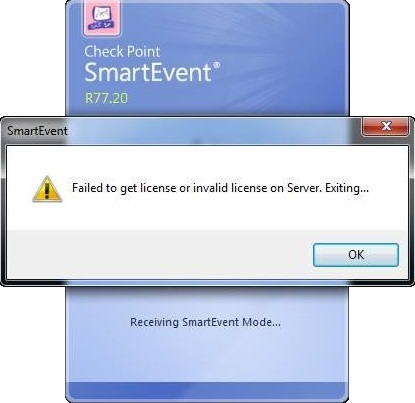
- * "`Failed to get license or invalid license on Server. Exiting...`" error when connecting with SmartEvent GUI to SmartEvent Server.
*Example*:
[](https://sc1.checkpoint.com/sc/SolutionsStatics/sk101361/Error.jpg "Click the image to see it in full size in a new tab/window")
* Output of *cplic print* command on SmartEvent Server shows the SmartEvent license, but there is no Contract Coverage.
## Cause
SmartEvent Server is unable to verify current contract coverage for SmartEvent Blade.
## Solution
Follow these steps to download and install the updated/new contracts file on the SmartEvent Server:
* Show / Hide instructions if SmartEvent Server and Security Management Server are running on the same machine
* R8X Management Server:
> 1. Connect with SmartConsole GUI to Security Management Server / Domain Management Server.
>
> 2. On the left Navigation Toolbar, click on the ***GATEWAYS \& SERVERS*** application.
>
> 3. In the upper pane, click on the Security Management Server / Domain Management Server object.
>
> 4. In the lower pane, click on the ***Summary*** tab.
>
> 5. At the bottom of the ***Summary*** tab, click on the ***Device \& License Information...*** link.
>
> 6. In the left pane, click on the ***License Status**.*
>
> 7. In the right upper corner, click on the ***Options*** button - click on the ***Refresh*** option.
>
> 8. All relevant licenses should appear with green ***(V)*** and ***Active***.
* R7X Management Server:
> 1. Connect with SmartUpdate GUI to Security Management Server / Domain Management Server.
>
> 2. Go to ***Licenses \& Contracts*** menu - go to ***Update Contracts*** - click on ***From User Center...*** .
>
> 3. Enter the relevant User Center username and password - click on OK.
>
> 4. Operation Status window at the bottom should show:
>
> * Operation: *Updating contracts on the Security Management Server*
> * Status: *Operation successfully completed*
> * Progress: *Done*
>
>
>
>
>
> 5. Verify that the Service Contract File was installed:
>
> 1. Connect to command line on Security Management Server / Multi-Domain Security Management Server.
>
> 2. Log in to Expert mode.
>
> 3. On Multi-Domain Security Management Server, switch to the context of the relevant Domain Management Server:
>
> ***\[Expert@HostName:0\]# mdsenv \***
>
> 4. Check the License and Service Contract File:
>
> ***\[Expert@HostName:0\]# cplic print***
> Refer to section "Contract Coverage".
>
>
>
>
>
> 6. If the issue persists, then reboot the Security Management Server / Multi-Domain Security Management Server.
If SmartUpdate GUI is *not* able to connect to User Center, then manually download the Service Contract File from User Center and import it via SmartUpdate:
1. Log into [User Center](https://usercenter.checkpoint.com/usercenter/index.jsp).
2. Go to ***ASSETS / INFO*** menu - go to ***TOOLS*** section - click on ***Download Contract File*** .
3. Select the option ***Generate service contract file for specific account(s):***
4. Select the relevant account.
5. Click on the relevant button - either ***Email File*** , or ***Download Now*** .
The ***ServiceContract.xml*** file will be sent/downloaded.
6. Connect with SmartUpdate GUI to Security Management Server / Domain Management Server.
7. Go to ***Licenses \& Contracts*** menu - go to ***Update Contracts*** - click on ***From File...*** .
8. Locate the ***ServiceContract.xml*** file (obtained in Steps 1-5) - click on it - click on ***Open*** button.
9. Operation Status window at the bottom should show:
* Operation: *Updating contracts on the Security Management Server*
* Status: *Operation successfully completed*
* Progress: *Done*
10. Verify that the Service Contract File was installed:
1. Connect to command line on Security Management Server / Multi-Domain Security Management Server.
2. Log in to Expert mode.
3. On Multi-Domain Security Management Server, switch to the context of the relevant Domain Management Server:
***\[Expert@HostName:0\]# mdsenv \***
4. Check the License and Service Contract File:
***\[Expert@HostName:0\]# cplic print***
Refer to section "Contract Coverage".
11. If the issue persists, then reboot the SmartEvent Server.
* Show / Hide instructions if SmartEvent Server and Security Management Server are separate machines
1. Log into [User Center](https://usercenter.checkpoint.com/usercenter/index.jsp).
2. Go to ***ASSETS / INFO*** menu - go to ***TOOLS*** section - click on ***Download Contract File*** .
3. Select the option ***Generate service contract file for specific account(s):***
4. Select the relevant account.
5. Click on the relevant button - either ***Email File*** , or ***Download Now*** .
The ***ServiceContract.xml*** file will be sent/downloaded.
6. Install the Service Contract File:
1. Transfer the *ServiceContract.xml* file to the SmartEvent Server.
2. Connect to command line on SmartEvent Server.
3. Log in to Expert mode.
4. Install the Service Contract File:
***\[Expert@HostName:0\]# cplic contract put -o /full_path_to/ServiceContract.xml***
7. Verify that the Service Contract File was installed:
***\[Expert@HostName:0\]# cplic print***
Refer to section "Contract Coverage".
8. If the issue persists, then reboot the SmartEvent Server.
If issue persists, for further assistance, contact Check Point Account Services in one of these ways:
* by creating a [Non-Technical Service Request](https://help.checkpoint.com/)
* by phone:
* Americas: +1-972-444-6600 - option 3 - option 5
* International: +972-3-611-5100 - option 3 - option 5
---
# Agent Instructions
This content is from the Check Point Support Center (https://support.checkpoint.com), the official knowledge base for Check Point cybersecurity products.
## Navigating This Knowledge Base
- **Complete index**: [llms.txt](https://support.checkpoint.com/llms.txt)
- **All SK articles**: [SecureKnowledge Sitemap](https://support.checkpoint.com/sitemaps/secureknowledge-sitemap-index.xml)
- **SK article URL pattern**: `https://support.checkpoint.com/results/sk/{skId}`
- **Markdown responses**: AI bot User-Agents automatically receive `text/markdown` content